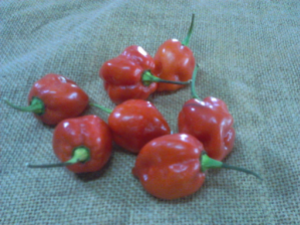
Yip, these are most definitely habaneros. A while back, I wanted to plant Jalapeños and bought a seed packet imported from the States. When the first lot of leaves started coming out, I had some doubts because they were heart-shaped rather than elongated. Nevertheless, Gnome told me to be patient and I waited a bit longer. The plants started flowering and then I watched the formation of the fruits with great anticipation. All this time, I kept on think to myself…
“Hmmmm…..”
Gnome: “My dear…be patient!”
Well, there’s not denying it! They are definitely habaneros!!
Red habaneros.
They are still nice and I do like the red colour of these habaneros. Okay…back to looking for some real jalapeño seeds!
A while back, I bought some sesame seeds from the market in Punta Gorda. It was sold in a thin plastic bag and when I got back home, I just placed the bag on the shelf in the kitchen. I am one of those messy types of cooks with a plethora of bags and containers of raw ingredients placed on my kitchen shelf for easy access.
The next morning I found the bag ripped open with tell-tale cat teeth marks on the bag.
Our cat has a predilection for all food in plastic bags; this is because once he found beef jerky in a plastic bag and since then he will attempt to chew through all plastic bags in the hope of finding beef jerky.
Some of the sesame seeds had spilled on the floor so I quickly vacuumed it with my little companion Eureka. The cat had scarpered by then and there was no hope of getting him to clean it up!
Eureka Is The One On The Left.
Thinking that it was just organic waste, I emptied the contents of vacuum cleaner into a nearby plant pot. And look what I’ve got 3 months later…surprise sesame seed plants!
Sesame Seed Plants.
Looks like it is an easy crop to grow…will probably harvest this lot to plant on the farm.
Last week, I wrote about making coconut milk cheese – feta style…this is the update. After the three days of dry brining, I took out the cheese and cut it into pieces like so:
Coconut Feta Cheese.
The cheese had dried to a firm consistency and so it was easy enough to cut without too much crumbling. I then placed them in 7% brine; one jar with bay leaves and the second flavoured with whole black peppers.
Flavoured Coconut Feta in Brine.
I am going to leave the jars out at room temperature so that they can ferment further for two weeks. After that, I will I will let them continue to ferment for several months in a cooler area (probably the refrigerator). Hope they taste good after all the waiting!!
Gnome Update:
Gnome has started on a project where he is digging out a small pond next to the house:
Pond Digging.
He has also started up some lotus seeds in a basin which have germinated and come up nicely:
Growing Lotus in Basin.
The plan is to have a lotus pond next to the house. Apart from the beautiful flowers, we also want to grow them for food. We would eventually like to make our own lotus paste to make Chinese sweets:
Lotus Paste.
This was sent to us as a gift all the way from Singapore; I am saving it to make moon cake this year. Also, lotus seeds are really tasty in Chinese soups…yes, you can actually buy these in Belize!
Dried Lotus Seeds.
Lotus root is also quite a treat and I would love to grow some of our own because I haven’t eaten it for over a decade since I came to Belize. It will probably take over a year before we can harvest any to eat.
I have a plethora of photographs, taken at opportune moments which are used for the purposes of writing posts for this Blog. I try to use up most of the photos but sometimes some are “left-over.” So, here are some pictures that can hopefully tie up some loose ends.
I still have not had the chance to add on to the Belcampo Foraging Tour (eco-lodge in Toledo, Belize) which was conducted a couple of months ago. There will be more of this coming soon. Anyway, this is a picture of hierba mora found growing wild on Belcampo grounds. This is a tasty green leafy spinach-like vegetable which is similar in taste and texture to the local callaloo.
Hierba Mora.
You can also buy a bunch of the cultivated variety of hierba mora at the market in Punta Gorda. The vendors use the name “callaloo” interchangeably between this and the Amaranth sp.(true callaloo).
Hierba Mora Bought at the Market.
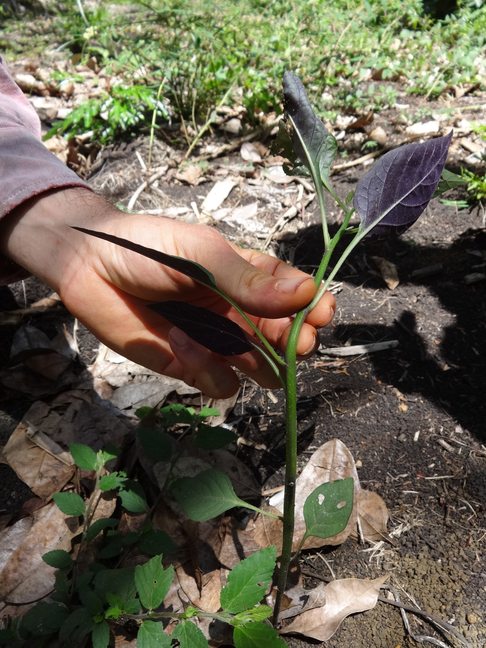
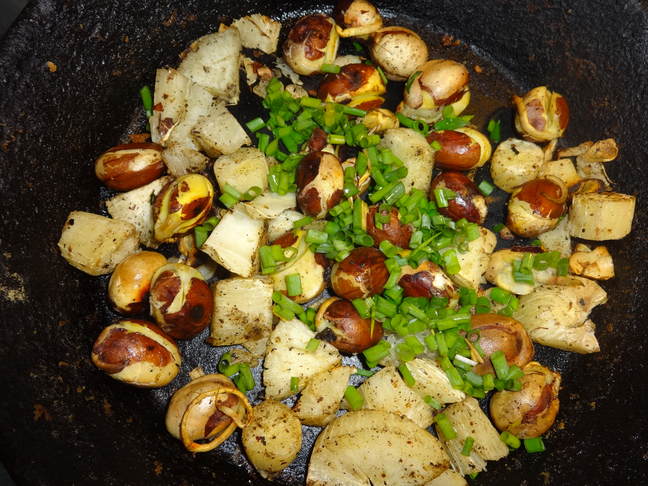
This is another jackfruit off-shoot. I had mentioned in my main article on this fruit that the seeds were also edible. The seeds just need to be boiled for about 20 to 30 minutes until they are tender. In this instance, I boiled the seeds and then stir fried the seeds with sliced garlic and garnished the dish with spring onion (I threw in some left over cassava). Needless to say, the meal was tasty!
Cooked Jackfruit Seeds.
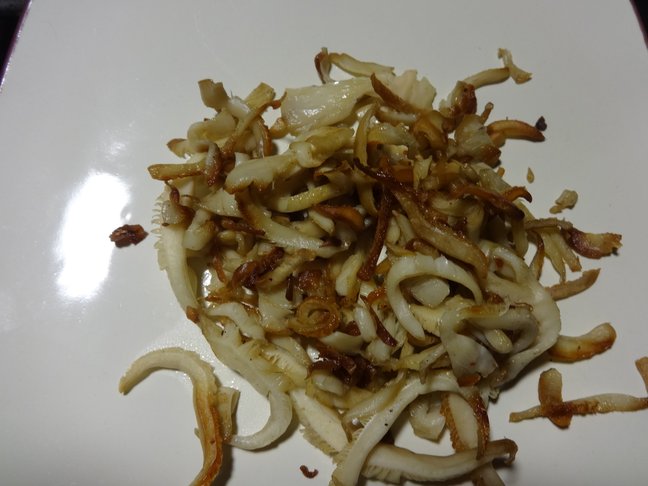
And, of course, I can write ceaselessly about mushrooms! We can’t get enough of fungus and we love eating them! Last week, we had spotted a whole load of lovely oyster mushrooms in somebody’s yard in Punta Gorda. We sliced and slow cooked them in butter. We have found that this is the best way to enjoy the delicate tastes of a wild mushroom.
Wild Oyster Mushrooms.Wild Oyster Mushrooms Cooked in Butter.
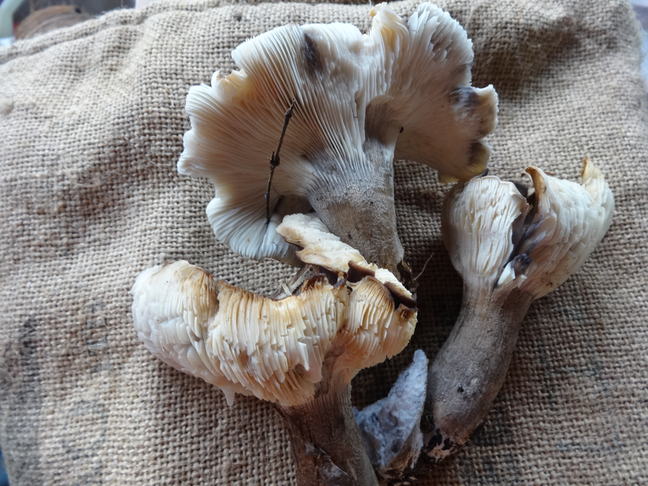
A couple of weeks ago, we stumbled across these mushrooms in our coconut plantation. We identified them as of the Russula sp.; many of the mushrooms of this family can cause gastric upset but none are known to be lethal. We decided to eat a test batch of these wild mushrooms…they turned out to be very good…and no stomach upset!
Russula sp.
One more mushroom picture! I raved on about the bamboo pith (stinkhorn) a while back because it was a revelation to me that the Chinese cultivated this particular fungus to eat. Here are some fresh specimens ready for chopping in our soup:
Fresh Bamboo Pith Mushrooms.
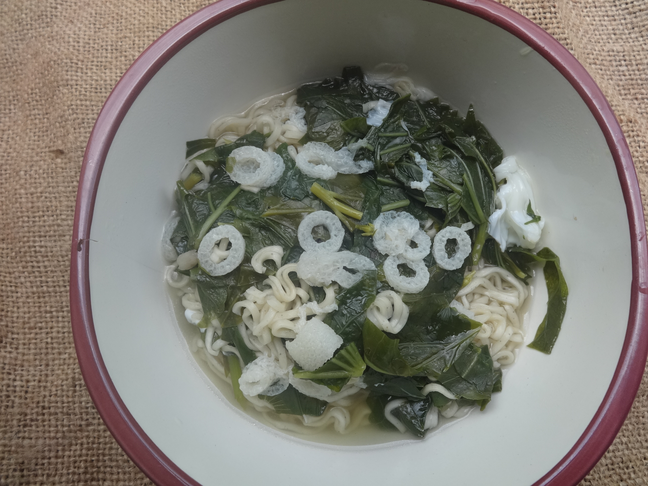
Cooked bamboo pith has the texture of bubbly honeycomb with the firmness of agar. There is no distinct taste. We like them!
Bamboo Pith Soup.
And last but not least. Matilda’s little piggies are doing fine. They are still in the maternity ward and they have started eating grass already. Everything on Paradise Pastures seems to be pretty hunky-dory at the moment. More on the Mayor Elections over the next few weeks!
We have our first big baby weighing in at a formidable 28lbs (14 kgs).
Jackfruit Baby.
We have had our eyes on this little one for quite a few months and have affectionately called them our jackfruit “babies” because they resemble giant pods that look like they will burst open at any moment and something alive will pop out of them!
This is the first year that our jackfruit (Artocarpus heterophyllus) trees have produced so we are very pleased. Jackfruit can weigh up to about 40 kgs so they give you a lot to eat. We picked this one when it started emitting its characteristic musky fragrance and when the outer shell was pressed, the flesh behind it felt softer.
A word of warning…if you ever get a hold one of these babies, be prepared to spend at least one hour preparing it. Use plenty of newspaper and coat your knives in oil to stop the latex from sticking onto the utensils. Also, wearing rubber gloves (and goggles!) helps so that you are not too immersed in goo and latex. Don’t let any of this worry you…it is definitely worth it!
To prepare, cut the jackfruit into quarters lengthwise. Then cut out the mid-line pith, like so:
Opened Jackfruit.
The jackfruit is mostly eaten for its delectable arils. Take these out and pop out the seeds. All parts of the jackfruit are edible so do not throw anything out except for the shell. So this is what you get:
The Fruit:
Jackfruit Arils.
The fruit can be eaten fresh. Our variety is a firm type which we prefer. There are softer varieties which tend to be moist and sweet and have the consistency of snot (still good, though). You can freeze the fruit and eat in the frozen form. They can be used to make desserts such as ice-cream or fruit pie. I really like my fruit savoury, so I am going to stuff some of these with minced pork. Yum! There are plenty of recipes to be found on the Internet; just look up Malaysian, Indian, Ethiopian and Cambodian cuisine to name but a few.
The Seeds:
Jackfruit Seeds.
These can be boiled and eaten as a snack or used as a carbohydrate accompaniment to a meal. They taste like breadnut (also Artocarpus sp.) or chestnuts (if you are from the temperate region). The seeds just need to be boiled for about 20 to 30 minutes until tender and the shell comes off easily.
The Rest:
Jackfruit Shavings.
Don’t throw out the rest of the fruit! A great deal of it is composed of unformed arils which are edible. They tend to be less mature and may have more latex on them. I use this part for cooking in stews, stir-frys and curries. You can also dip them in batter and fry them in oil (like onion rings). Again, this part of the fruit can be stored in the freezer.
A couple of weeks ago we were asked by Belcampo Lodge (an eco-lodge in Toledo) to assess their foraging tour. We were accompanied by their guide, Jose Vellos and we went on a two hour trek around Belcampo grounds. We would like to share with you some of the plants and trees that we came across…we probably saw up to about sixty plants mostly noted for their edibility, medicinal or useful purposes. All in all, the tour reinforced the diversity of plants in the rainforest and it was very educational for everyone involved. I will probably write about this tour in wee instalments since I have so many pictures to show you.
This is a picture of a Strangler Fig of the Ficus sp.; the seeds end up dropping in crevices of other trees and as they grow, they form roots which bind around the host tree, eventually killing it.
Strangler Fig.Strangler Fig.
This one is the Central American Rubber Tree, also known as Castilla elastica and Panama Rubber Tree. Here is a picture; if you look carefully, you can see some latex dripping out from the multiple scores on the bark. During the heyday of the rubber industry in Central America, these trees were tapped for their valuable latex. As an historical aside, the rubber from this tree was used to make the ball used for the famous Mesoamerican ballgame Ollamaliztli.
Rubber Tree.
Close-up picture of the foliage:
Rubber Tree Leaves.
These are the fruit of the rubber tree; Gnome took some home to start a rubber plantation…he wants to make his own thigh high rubber boots one day (for walking about the farm in the wet season). NOT a cosplay fetish!
Rubber Tree Fruit.
This one has many names…we have heard of the following: Bull’s Eye, Deer’s Eye and Horse’s Eye. Gnome suggested re-naming it ” Some Sort of Ruminant’s Eye” as a catch-all term. I don’t know…mmmm…not a very catchy name?!
Picture of the seed with the dried pod:
Deer’s Eye/ Bull’s Eye/ Horse’s Eye.
The locals tell us that this seed is used in childrens’ games where it is rubbed very quickly against the pod and then transferred onto somebody else’s skin to cause a scalding effect. This is done for fun and laughs in the bush! It happens less now that everyone has Galaxy phones 😉
Happy Sunday to you all!! We have some more fruit on our farm; luckily this time, there is an abundance so we can share with the birdies, pacas, dogs and guinea-pigs.
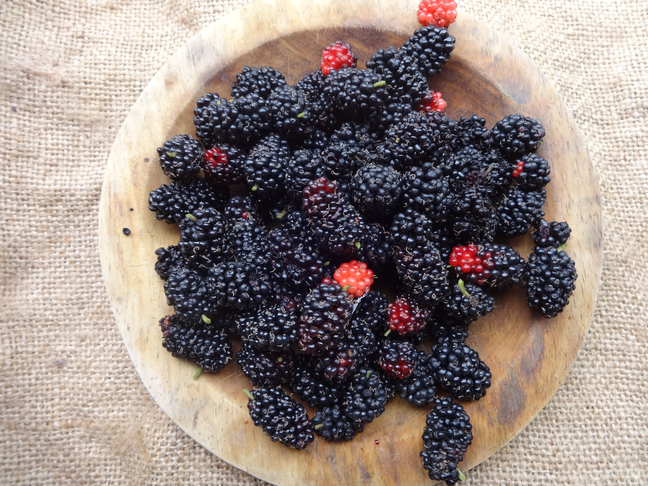
The mulberries are giving plenty of fruit. There is one particular tree which is half hidden in the shade of a huge African oil palm so the birdies have not spotted this one. This year, we will be able to make mulberry Elixir (liqueur).
Mulberries.
This is wax-apple; we are into the second year of fruiting and it is producing so much. They are related to the Molly (Malay) apple but these fruits are crunchy in texture like apples. The guinea-pigs really love these ones!
Wax Apple.
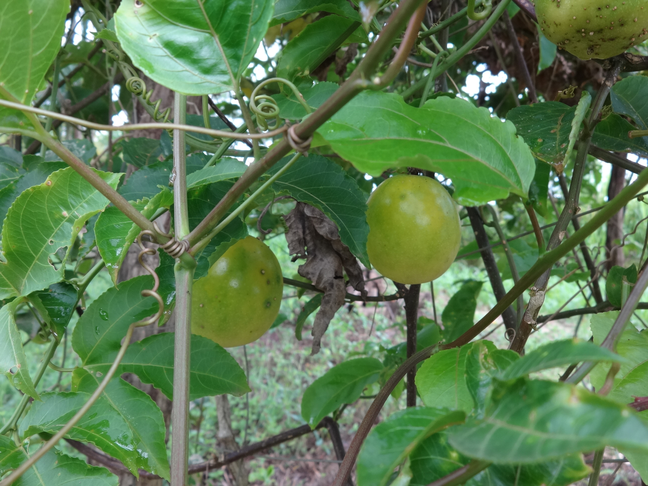
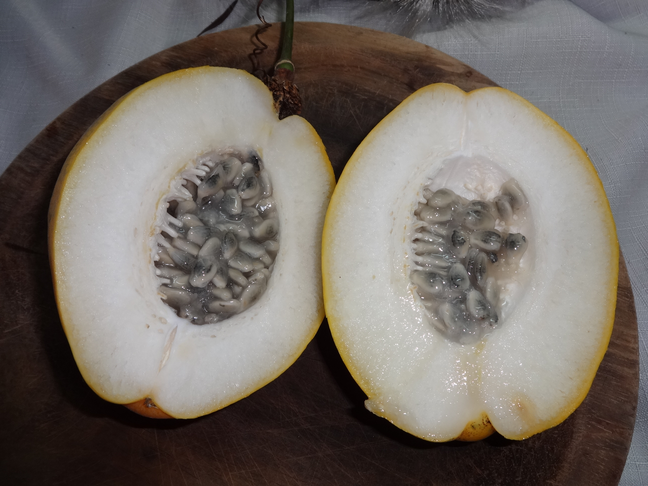
The passionfruit are just starting to bear. I like to combine the pulp of this with the Mayan passionfruit (Kun Batz) to make juice. I find the Mayan variety is sweeter so that it helps to balance the acidity of this type.
Passionfruit.Ripe Kun Batz.
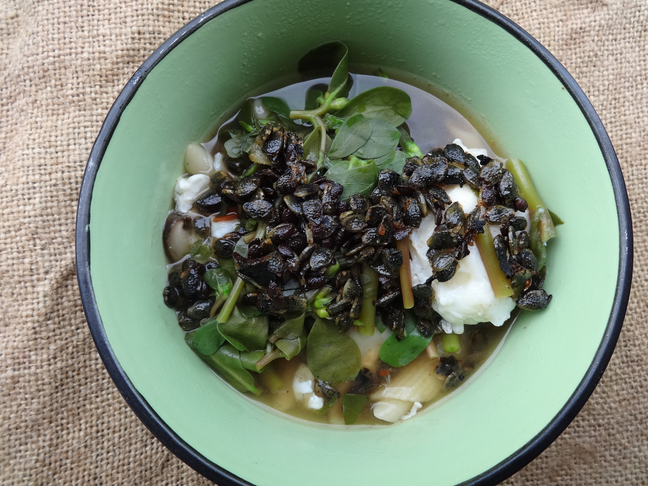
With all the passionfruit juice making, I have ended up with a whole lot of seeds. As an experiment, I tried toasting them on a skillet in a similar manner to pumpkin seeds. They actually turned out to be a very tasty snack/condiment; as you toast them, the residual passionfruit pulp around the seeds caramelises to add a unique sweetness. I used the toasted seeds as a condiment on soup which worked a treat. The crunchy texture gives an extra bite to a meal:
Toasted Passionfruit Seeds with Soup.
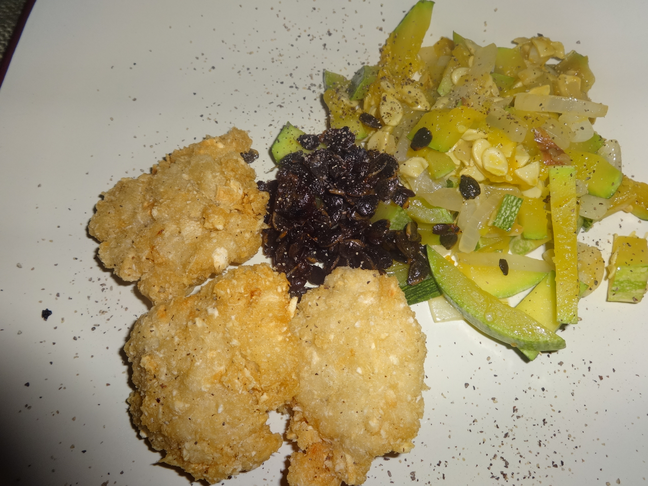
Also, we had some as an accompaniment to cassava hash browns and steamed young pumpkin. They added an extra “sweet and sour” flavour to the dish.
Toasted Passiflora Seeds with Cassava Hash Browns.
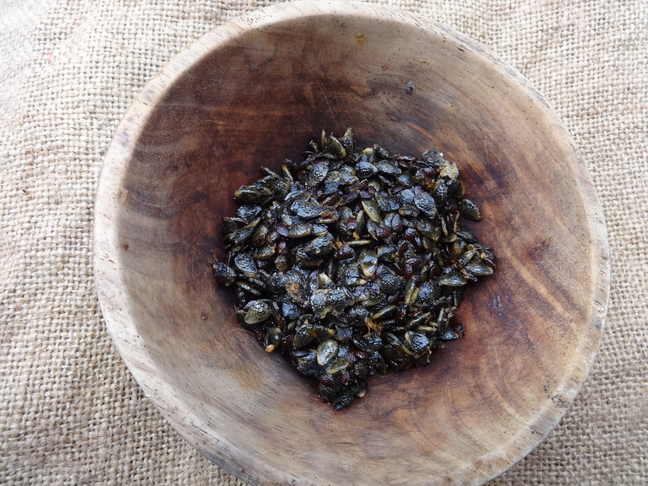
I would definitely recommend the toasting of passionfruit seeds. It just requires 10 to 15 minutes on medium heat on a skillet. Make sure to stir it around to stop it from initially sticking. You will know when it is done when the pulp caramelises around the seeds. It is so versatile that you can choose to eat it with sweet or savoury foods.
We are posting up our first lot of seeds for sale in The Apothecary. This is the season for Sapodilla (Manilkara zapota) and so we are offering these fresh seeds as a once off for the year. until they run out.
Just out of interest, when we first moved to Belize 10 years ago, one of the first things that we did was to buy fence posts to delineate a border around our farm. In Belize, the best wooden posts, which are supposed to last a lifetime are ones cut from the sapodilla tree. We ordered quite a fair amount and we felt that, out of respect for the tree, we would plant an orchard of them on our farm.
Sapodilla Fruit.
We bought a wide variation of this fruit from Punta Gorda market; some were round-shaped, others heart-shaped and some very large like grapefruit. We planted all the seeds from the different morphological varieties and the trees started bearing within 7 years. It was a long time to wait but definitely worth it.
Sapodilla Fruit, Ready To Eat.
As you can see from our projects, it is a very good tasting fruit which is ideal for wine-making and culinary delights like curries and pasta sauces. It can also be used for sweets like fruit tarts, jams and preserves. Sapodilla has a unique sweet flavour of cinnamon and caramel; the texture is that of a grainy peach. It is also a very good timber for fence posts and carpentry. The seeds have medicinal value and can be used crushed up for insomnia and as a natural sedative. The tree is famous for chicle which can be tapped from the trunk.
Sapodilla Seeds.
To germinate, they can be placed 2 inch deep in moist soil; this will take up to 6 weeks. The other option is to carefully remove the shell from the seed (this can be a bit tricky) and then placing it in 2 inch deep soil. The second option allows faster germination …usually within 2 weeks. Keep the plant growing in a pot for a full year and once you are ready to plant, allow 10 metres (30 feet) between each sapodilla tree. They get really big!!
For our international readers, you can grow this plant in a green house or indoors and kept like a bonsai. Check out The Apothecary if you want some seeds.
 Yip, these are most definitely habaneros. A while back, I wanted to plant Jalapeños and bought a seed packet imported from the States. When the first lot of leaves started coming out, I had some doubts because they were heart-shaped rather than elongated. Nevertheless, Gnome told me to be patient and I waited a bit longer. The plants started flowering and then I watched the formation of the fruits with great anticipation. All this time, I kept on think to myself…