Category Archives: Farming

Busy Day.

Munchkin.ShoutingWe have had a very busy and productive day on the farm.  I have started to pick pigeon pea (Cajanus cajun) which is an edible legume…
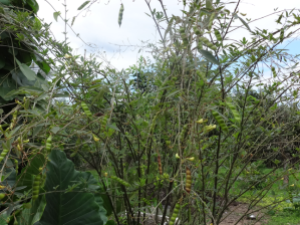
Pigeon Pea Plant with Green Pods.

I harvested the brown pods as you can see:
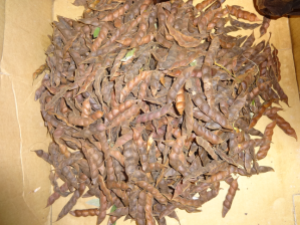
Pigeon Pea in Pods.
Pigeon Pea in Pods.

This is the time of the year to pick this bean and if I keep up with the harvesting, the plant usually flowers two or three times making it a very prolific producer.  Once we have gathered all the brown pods over a succession of weeks, we shell them all at the same time with a gnome-mechanised contraption.  The pigeon pea tastes similar to lentils with more of a bite.  Watch out for some recipes later on!!

Gnome.SmilingGnome has been working hard.  He is not in a very talkative mood  right now so I will tell you what he has been up to today:

He has been cleaning the coconut plantation:
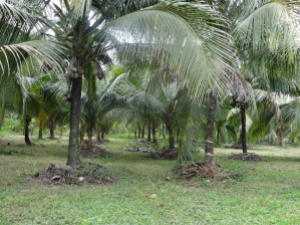
Coconut Plantation Mowed.

He has been grating coconuts:

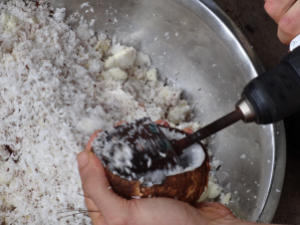
Grating Coconut.
Grating Coconut.

Gnome attaches a grater onto the end of a hand drill.  We use the coconut in cooking and the animals like it too.

He has also been busy making a batch of soap today and right now, as I am writing, he is cutting the soap.  No pictures yet…maybe later!!

Cleaning up the Coconuts.

Working Together.

We were both cleaning up our coconut plantation today.  I had to collect the coconuts and pile them all in a specific area.  Gnome had to clean up the coconut palms by cutting down the old leaves and mulching them around each tree.  We made it a bit more fun by admiring (and taking pictures) of beautiful bush plants and mushrooms as we went along.  Here are the pics:

Earth Star Fungus.
Earth Star Fungus.
Orchid on Coconut.
Orchid on Coconut.
Beautiful Pink Flowers on Bush Vine.
Wood Ear Mushroom.
Wood Ear Mushroom.

Of course, real life is better than the actual pictures but I hope that we have captured the essence of the simplicity of our lives through them.

Cheers and have a good evening!

The Joys of Brimstone and Lime.

Gnome.Looking.Serious

Today was a good day to make some lime sulphur, a smelly concoction that has multiple uses as a fruit tree anti-fungal and as a pet dip for things like mange and ringworm.

One of my friends is trying to grow grapes, which in this climate are very susceptible to a plethora of fungal diseases; he asked me to make some lime sulphur for him since I am a Gnome and Gnomes like messing around with smelly stuff.  Also, I am a Catholic Gnome, and obviously Brimstone, Smelliness, Catholic and Gnome are a match made in Heaven (hee, hee, hee…)!

Anyway, you need sulphur or brimstone…

Flowers of Sulphur.
Flowers of Sulphur.

And you need white lime…

White Lime.
White Lime.

And you boil them together…

Boiling Sulphur and Lime together.

…to get Lime Sulphur.

It is dirty, smelly work and you need to be careful as it is quite poisonous and caustic though the sulphurous fumes of brimstone are very soul-cleansing!!

After boiling for a while it looks like this…

Lime Sulphur Transformation Complete.

…a dark red-brown-rotten-egg-smelling liquid…

If you want to make your own…look at my recipe in Bored-In-Belize:  Making Lime Sulphur.

Until later, take care!

Black Pepper Galore!

Munchkin.Another.LookThis year, our black pepper plants started bearing well.  The last few years, we have just had a few minor fruits but not much to speak of.

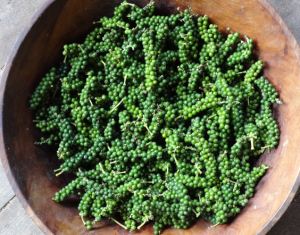
Harvested Green Peppercorn.

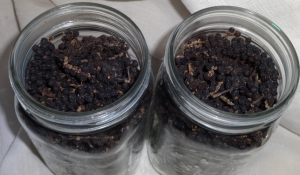
The picture above shows picked peppercorns from two plants only.  The green drupes started in September and I had actually been watching them all this time waiting for them to mature to red peppercorns.  At that stage, white pepper can be made through a process of retting and fermentation.  But, alas I have grown impatient and decided to have black peppercorns this year.  So, for the last few days, the pepper has been spread out to dry in the sun.  It took 3 days for the pepper to dry completely to its black state.  I managed to get two quart jars of dried black peppercorns…not bad from just two plants.

Dried Black Pepper in Jar.

Just out of interest, to keep the green colour of the pepper they have to go through a preservation process (using sulphur dioxide like in dried fruit) before drying.  Similarly, to get red peppercorns, preservation of colour with a chemical is used before drying.

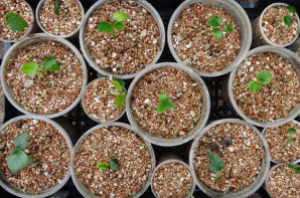
Our black pepper plants were grown from cuttings about 2 to 3 years ago. This perennial woody vine prefers shade and so we planted ours next to coconut trees so that the vine would grow up the trunks.  This was a great combination because the fallen coconut leaves produced humus and leaf litter which set up perfect growing conditions for the pepper. Piper nigrum are known to produce fruit for up to 7 years after the first flowering.  I found some pepper seedlings in the leaf litter and I have potted these so that we never have to buy black pepper again!

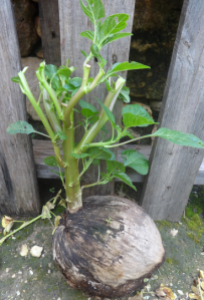
Black Pepper Seedlings.

Messing With The Bees!!

Gnome.OroToday I moved some bees into my new hives!

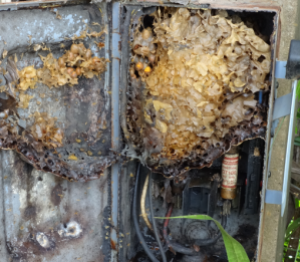
I had a colony of stingless bees living in my electricity breaker box; needless to say, not the best place for them…

Wild Bee Hive in Breaker Box.

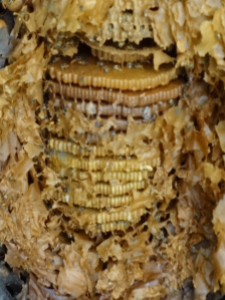
The first thing was to remove the wax surrounding the brood chamber…

Exposed.Brood.Comb
Brood Comb Exposed.

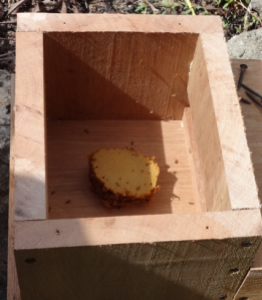
I then had to carefully pry all those combs out in out in one piece trying not to damage anything as much as possible.  I then carefully halved the comb (since I made two hives) and put them in their new brood chambers…

Half.Brood.Comb.in.Brood.Chamber
Half of the Brood Combs Gently Placed in Each Hive.

The covers were then all sealed up and the hives moved closer to the house for protection and observation.

This was also the first time we tried stingless bee honey.  It was delicious; sweet but more watery than normal honey and with a truly intense floral aroma.  It was like drinking liquid flowers.  We also tried some of the pollen and the only word I can think of to describe it is amazing.

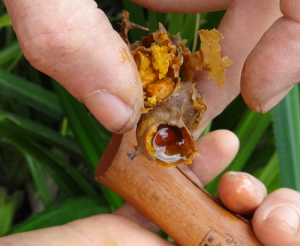
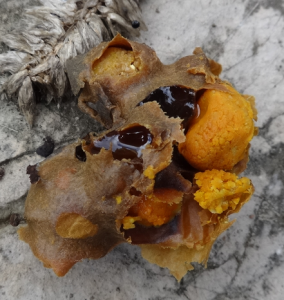
Unlike the bees we are familiar with, the honey and pollen is stored in pots…

Stingless Bee Honey and Pollen Pots.

Here’s a closer look without my grimy paws in the way…

Honey and Pollen Pots.

I’ve spent the whole morning looking at my new friends and they are starting to zoom in and out of their new homes, making it nice and comfy for themselves.

I can’t wait to build more hives!!!

I hope you are having as wonderful a day as I am!!

Spicy Tiny Potatoes.

Munchkin.Face.Dark

Today I harvested 4kg (8lbs) of a little known ground root in Belize called Koorka.  They are little tubers about 2.5cm (1 inch) in size.  You eat them like you would potatoes.

Bumper Crop of Koorka: Spicy Tiny Potatoes.

This year we did an experiment to figure out how best to grow them.  We started the vegetable from cuttings and put some in clay, furrowed earth and 2 foot high beds filled with decomposed rice hulls.  We got the best crop from the beds and the largest size of tuber.  The ones in clay were tiny and took the longest to harvest; it was back-breaking!

Koorka in the Ground.

This plant is actually from the Mint Family (the leaves resemble mint a lot) and it grows prolifically.

Piectranthus rotundifolius.

It is an easy crop which requires very little maintenance.  It is usually planted as soon as the first rains start (May) and then harvested when the plant dies back (usually December to February).  They have the same consistency as potatoes and when cooked, emit a slightly spicy aroma.  They are high in Vitamin A and Calcium.  Another great thing about these little ‘potatoes’ are that they can contain twice ( 5-13%) the amount of protein compared to a normal potato.

Every-one in Belize should have some of this in their own back yard.

All the animals on the farm love to eat the tuber raw.  We give the little bite size ones to the piggies and they gurgle with delight when-ever they spot one of these tasty treats.  And goosie…he was in top form today…circling around me menacingly hoping to steal my koorka from my bucket.  He was really mean and bossy!


I’m Going to Keep Stingless Bees!

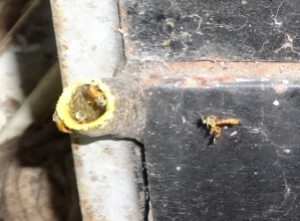
Gnome.SmilingI think our local stingless bees are really cute, the species I have nesting in one of my old tool boxes is Tetragonisca angustula…

Tetragonista angustula in one of my old toolboxes.

They are nice and friendly and you don’t need any fancy beekeeping equipment since they don’t sting.  It seems like a better start to beekeeping to me than going for Africanized Bees.

They don’t make much honey apparently, only about 1kg a year but what they do make is supposed to be very medicinal…which is right up my alley.  They are also good pollinators for assorted crops.

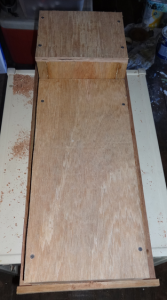
Anyway, the point of all of this is that I made a couple of beehives in order to get this project underway…

Finished Hive.
Finished Hive.

Yeah, I know, it doesn’t look like much and I suck at taking photographs (but I am better at stitching up your face with some 7/0 prolene, thankfully…sorry doctor joke!).

If you are interested, there is more detail in constructing the hives in Bored-In-BelizeMaking a Stingless-bee Bee Hive.

With the amount of honey these little darlings make, I’ll probably have to make about 100 hives…one day at a time…

Thank you to Leanne and Craig Knox for giving me the idea.

Cheers and have a good day!

Farm Fresh Cassava Hash Browns.

Munchkin.Eating.Bun.SmileThis one is truly farm fresh from digging in the dirt to the dining room table!  This morning, Gnome dug up 5kgs (10lbs) of cassava on our farm (about 3 plants only) and afterwards we both set about to wash and peel our freshly acquired roots.

Washed Cassava.
Washed Cassava.
Cleaned and Peeled Cassava.

Next, we grated the cassava.  This was done by hand and this part took the longest length of time (about 2 hours).

Grated Cassava.
Grated Cassava.

We then washed the grated cassava once with water to remove some of the starch.  The washed water was retained so that the starch (tapioca) could be obtained from it.

We reserved some washed cassava to make Cassava Hash Browns Topped with Mozzarella which was a lovely treat after all the digging, washing and grating!

Cassava Hash Browns topped with Mozzarella.

Next, we took the remaining grated root and reserved cassava water and laid them all out in the sun to dry.  This is to make dehydrated fufu which is an African/ Caribbean preparation of cassava in which the vegetable is boiled and then pounded with a large wooden mortar and pestle to make a dough-like food.  Traditionally fufu is eaten with soups.

So, out of our harvest of 10lbs of cassava, we obtained: 2lbs of sun-dried fufu and 2lbs of tapioca flour.  Not to mention a snack of Cassava Hash Browns!

Jar of FuFu.  The Finished Product!
Jar of FuFu. The Finished Product!

Gnome said that today was a good lesson on realising the time and energy required in processing food from harvest to finished produce.

The Wart of Evil Part II.

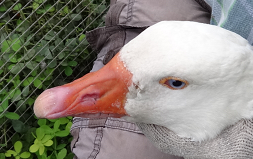
Gnome.SmilingIts been a few days now since we tied off the Wart of Evil.  As we predicted, it has dried up and our Gander can see from that side of his face a lot better…

The Wart of Evil Has Been Removed!!

We think that he is a lot happier because he cooperated fully without honking or biting while we cut it off…

The Wart of Evil.
The Wart of Evil.

It is all supposed to be a bit of a joke but I swear to you that our goosie has had a personality transformation and has turned into a happy-go-lucky, loveble sort of fellow.  He now hangs out with our duckies and acts as a body guard to them, there is no more pecking and bossing around.

I’ve put the Wart of Evil into a vial and am in the process of pickling it in alcohol.  The transformation into the Wart Against Evil (TM) has begun.  I will update you once it is ready and make it available for your personal use (probably in the New Year, once I get the Shop finally going)!

In the mean time, be safe from Evil!!