Tag Archives: Bored-in-Belize

Haiku Gnome.

Gnome.Writing.in.the.LibrarySome of you may have noticed that Gnome has started posting up Haikus.  I think that it is a good thing and it gives us a few giggles and guffaws.  Often when we find something humourous, nobody else does so this one may purely be for our own benefit.  Though we would be pleased if these were received with joy and release  in your hearts too.  😉

So, how did this come about?  This is what happened…

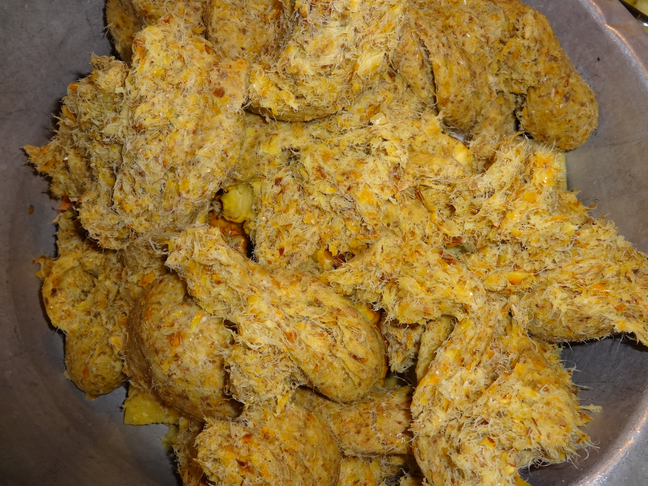
I had received a pannetone cake tin from a friend and I was anxious to bake one and show a picture on my Blog.  Well, that was the plan anyway.  In my usual haphazard way of baking  I proceeded without a recipe.  Just sort of made it up.  Needless to say, the baking venture went wrong.  I was all in a tizz in the kitchen, getting myself into a maddening hysteria.  It was one of those really, really hot days.

Munchkin.Wailing

Gnome was hot and bothered too and was in no mood for my antics.  He said rather coarsely:

“If you had actually read a recipe and done it properly, you wouldn’t be in this mess!  It’s your own fault!”

Gnome.Angry.Look

Waaaahhhh!!  I was none too pleased with his reply.  It made me Waaaaahhhh!! even more.

When Gnome realised that his directness had only served to exacerbate the situation, his countenance suddenly changed.  Anger was replaced by cool placidity.  He said with unwavering surety,

“The caterpillar must grow wings in order to flutter high.”

Glowing.Gnome

Gnome had made a complete U-turn in our usual “chucking-a-maddy”script which shifted me off balance.

I paused in mid-flail.  Arms in the air.

What an obtuse reference…it was all too funny!!  We both saw the stupidity of the whole situation and cracked up laughing.

This is when we got the idea that Gnome should start writing Haikus.  Often, he is viewed as too direct and honest in his words.  So this is an opportunity for Gnome expression; nicely obtuse and obscure and uncharacteristically airy-fairy for an immensely pragmatic Gnome.

It is Bamboo Shoot Time!!

Together.SmilingAugust and September are the months to start harvesting and preparation of bamboo shoots in Belize.  I have put this day project as a Bored-in-Belize article.

Giant Green Bamboo.
Giant Green Bamboo.

All the details, with extra step by step pictures are in the specific page but I will attempt to tantilise you with some highlights in this post!

This part is Gnome’s job.

Full.Length.GnomeBasically, you have to use a machete to cut into the culm and then you bang the machete with a sturdy stick to cut into it.

Harvesting Bamboo Shoot.

Once you have the bamboo shoot, you carry it off to a Munchkin to prepare:

Munchkin.Ninja.Flying

Preparation of Bamboo Shoot.

The shoot is chopped into sections, peeled and then cut into chunk sizes.

Cut into Sections.
Cut into Sections.
Bamboo Shoot Layers.
Bamboo Shoot Chunks.

Next, the chunks are boiled to remove the bitter components.

Boiling.Bamboo.Shoot

Once cooked, they are soaked in cold water for a few hours and then they are ready for eating or preservation.  This time round, I layered slices of bamboo shoots with salt to dry brine.

Jar of Bamboo Shoots.

What fun!!  I hope I have inspired some of you to go bamboo shoot hunting this season!!

And of course, we are eating fresh bamboo shoots everyday.  Once you have tasted the fresh stuff, you will never want to go back to the canned shoots.  Fresh shoots are velvety in texture with very little fibre.  They are sweet and totally delicious.  Here is a snapshot of what we had for lunch today: Sausage with exotic fruits and fresh bamboo shoots.  What a treat…will post the recipe up tomorrow.

Sausage with Exotic Fruits and Fresh Bamboo Shoots.

Have a Good Night!!

A New Hive For a New Colony.

Gnome.SmilingGround-breaking News  in the world of Stingless-bee Beekeeping: Today was a good day to check on the bees.  Unfortunately my last transfer was not successful (bringing my success rate to a ridiculous 50%) and it was time to clean the dead hive and make some improvements for another transfer.

Dead Brood Comb in the Brood Chamber.
Dead, Rotting Brood Removed.

After cleaning and disinfecting the hive I added some improvements to deal with the cause(s) of this problem:  parasitic fly and too much space. Number One:  Seal the hive with beeswax.  No excuse for this really…it has been laziness on my part.

Sealing up the Hive Parts with Bee's Wax.
Sealing up the Hive Parts with Beeswax.

And Number Two:  Bypass the honey pot chamber for three to six months (maybe longer) until the bees have completely taken over the brood chamber using blocks of wood that fit together in such a way that they only leave a small passage through the honey chamber.

Blocks of Wood Bypassing the Honey Chamber.

To commemorate this simple hive, I have called it the Gnome Mark III Stingless-bee Bee Hive. The previous UTOB Hive ended up having two established colonies (again), one in the honey chamber and one in the brood chamber.

Brood in the Honey Chamber (again).

This is what I transferred into the new GM III hive today.

Removing Brood Comb.
Brood Comb Successfully Transferred.

The rest of the Honey, Pollen and Wax were harvested for a Munchkin with a sweet tooth!

Our first small harvest of honey, pollen, wax and propolis.

May we all experience the joy of fresh stingless-bee honey! Cheers!!

Tuesday Night Storm, Internet Down and Pineapple Melomel.

Together.SmilingHello There!!  I will try to catch-up with this post and bring you up to date.  On Tuesday night we had a scary, gusty storm that resulted in a power-cut for most of the night and of course, the Internet went down with it.  The storm has brought cooler weather with grey clouds and it even rained heavily this morning.  The Internet started up again today…yay…it is so insidious how we feel that “we need Internet” and life just isn’t the same without it. When I down-loaded my bunch of late emails, they weren’t all that exciting and most of them were spam, anyway!

Well, since it was a Rainy Day, we made Pineapple Melomel (mead with fruit).  Yesterday, I had bought 20 ripe pineapples from the market for BZD 30.00 (USD 15.00) in an attempt to excite Gnome into making some more booze (nice, sparkling, champagne-like stuff) for me.  After I got the pineapples loaded onto the truck, he gave me a whiny look and said that he was hoping that I had bought the plantains instead of the pineapples.  That remark got him a “Chinese Woman Look” and stopped the complaints quick smart.

This is what we did.

We removed the heads and scrubbed them in the sink:

Washing Pineapples.
Washing Pineapples.

I then started chopping up the pineapples.  Whilst I was doing this, I kindly asked Gnome to take some pictures of this process.  All the pictures were soooo baaaad!!  They were out of focus and made my hands look stumpy and small…or, are they really like that?  I had to re-take some photos:

Chopping Pineapples...Look No Hands!!
Chopping Pineapples…Look No Hands!!
Pineapple, Chopped.
Pineapple, Chopped.

Gnome put the pineapple chunks through the juicer to get the juice and the pulp:

Juicing Pineapple.
Juicing Pineapple.

We ended up processing 10 pineapples in all because it was actually a lot of work and the juicer was over-heating and complaining with the work-load.  So, we managed to get about 6 litres (1 and 1/2 gallons) of juice from it all.

Frothy Pineapple Juice.

We got an extra 2 litres (2 quarts) of juice from the squeezing of the pulp:

Squeezed Pineapple Fibre.

We waste nothing!!  We gave this and some pineapple peel to the duckies this morning.  It was a Pineapple Feast…look closely at silly white duck…he even has a bit of pineapple stuck to his head.

Pineapple Fest For Duckies!

We have noticed that our duckies are totally neophobic with food unless it is yellow in colour.  So, I was received by joyful and frenzied quackings today when I brought out the basin of pineapple waste.

Duckie Eating Pineapple.

While I was out playing with the duckies, Gnome proceeded with the making of his pineapple melomel; honey and fresh Toledo rainwater (very fresh!) was added to make the batch up to 5 gallons.  Gnome will be posting up the recipe in Bored-in-Belize over the next few days.

Heating Melomel:

Heating Melomel.
Heating Melomel.

Yes, I know…it all looks very yellow (just like all the other pictures) but believe me, this will taste great!  Tomorrow, we will be processing the rest of the pineapples and adding honey and fresh ginger.  In the words of Gnome, “Make it a Metheglin.”

It Is Time for More Bees: The Gnome Mark II Bee Hive!

Gnome.With.BoxAbout a week ago, I opened up my stingless-bee, bee-hives to check up on the little darlings and discovered that in one of the hives the bees had started to build brood comb in the honey pot storage area.  When I saw it, it was about half the size seen in the photo below.  It doubled in size in a week!

Brood Being Built in the wrong place.  This is where honey is supposed to be stored!
Brood Being Built in the wrong place. This is where honey is supposed to be stored!

Out of curiosity, I got in closer to have a goosie:

Brood Comb Being extended with honey and pollen pots visible in the periphery.

It would appear that the bees have built an auxiliary brood area with new queen and everything in the middle of the honey chamber, co-existent with the original brood in the brood chamber with its own queen; so, two hives in one.  I hypothesise that this is due to the depth of the honey chamber (which is currently set at 2 3/4 inches).  The honey pots are about 1 inch tall so it is obvious that there is plenty of volume for a “nest” of brood comb even over a layer of honey pots.

I decided to test this hypothesis by reducing the depth of the honey chamber to 1 1/4 inches.  Here is the new hive, which I have called the Gnome Mark II Modified UTOB Hive:

The New and Improved Gnome Mark II Modified UTOB Hive.

Compared to the original UTOB Hive:

Original UTOB Hive.
Original UTOB Hive.

I admit, not a Mind-Boggling Difference but putting it together in Dry Season Super Heat Time made me feel like it was something amazing and deserving of its own name!

Anyway, I took the “extra” brood out and put it in the brood chamber of the new hive:

Transferring Brood from the Old Hive.

…Into the new hive:

Brood Placed in the New Hive.

Here’s another shot after more brood was moved over:

All the Brood Moved to the New Brood Chamber.

And that was that, all the hives were sealed up and put into their places.  Now it is time to wait another month or so before checking on them again…

I love stingless bees!

Gnome.with.Drink

Miso Madness V…The Next Generation.

Gnome.Looking.Serious

On this day the Miso Mission has been accomplished.  The rice koji was ready and properly colonised and both of us were in the right frame of mind, with only a mild attack of filibustering on Munchkin’s part (she had very specific plans as to what she expected to do this morning), to tackle the mountain of beans and gallons of purple-black bean juice (from boiling said beans) required for the making of our Belizean-Style Black Bean Shinshu Miso.

The black beans were defrosted, boiled to tenderness (which thankfully doesn’t take too long with black beans), drained and then mashed.  The use of words makes things appear so easy but while doing, it certainly seemed that there was a veritable mountain of beans.  I left the temperature probe out of the rice koji and room temperature was 36C, so the mashing built up a bit of a sweat.

Starting to mash the beans.
The Never-Ending Beans!

In the mean time, Munchkin, while muttering to herself that she needed to do other stuff, mixed the bean juice with sea salt, cooled it and added some commercial miso to the mix (for extra lots of beneficial microorganisms).  Thank you, Adriana Guzman for giving us some for this purpose.

Black Bean Juice, Sea Salt and Old Miso to Make the Liquid Portion.

The rice koji had to be added to the beans and mixed well.  Using a spoon did not work and I had to resort to using my hands…you can see the excitement that was gripping me at the time!

Adding the Rice Koji to the Mashed Beans.
My hands convulse with excitement as I mix everything together!

After adding the liquid portion and mixing again, it was time to fill the prepared 5 gallon pig-tail bucket.  This accomplished, a nice layer of salt was added on the top for protection against undesirable microorganisms.

Bucket-Full-of-Miso Ready for Sealing.
Sealed Bucket...only have to wait 12-18 months now.
Sealed Bucket…only have to wait 12-18 months now!!

What happened next was a total, super bonus for me, though it earned me this look from the Munchkin…Munchkin.Upsidown.Upset

…there was still a whole lot of rice koji left and in the back of my mind I couldn’t help but think of the 28-day Miso Countdown before we run out…the solution…shiro miso.  This type of miso is made up mostly of rice koji, only half the salt and a little bit of beans (compared to shinshu).  The beauty of it and the reason why it is of critical importance right now, is that it only takes four to eight weeks to mature.  Bonsa…we have the answer to our miso shortage!

So, I figured we could make a test gallon of this sweet miso but after measuring out the required koji, realised that we used up all the beans in making the monster bucket; we still had bean juice left-over but no beans.  Resolution:  fortunately I had already grated the day’s quota of coconuts and Munchkin had already squeezed out the cream from them (for selling in town to people that don’t want to buy cans or powdered coconut cream) and we were left with the meal.  We decided to experiment and replace the bean portion of the miso with de-creamed coconut meal.  Once the cream is removed, what is left is actually quite high in protein and while not a legume, it might make a good replacement for beans (it also makes things Belizean and exotic!).  We still used the left over bean juice though.

Mixing the coconut, rice koji and salt.

The bean juice gave everything a slight purple tinge (pretty cool, actually!)…

Bean Juice Added to the Miso.

Here it is packed into a gallon jar:

Coconut Shiro Miso.
Coconut Shiro Miso.

You would think that this was enough…hee…hee…hee…but I got another look shot my way…

Munchkin.Fury…there was still another lot of koji left to make another batch…so we did…

Five gallons of shinshu miso and two gallons of shiro miso…not bad for a day’s work!!

Day Four of Miso Madness.

Gnome.SmilingIt is hot yet again, slightly more humid though, perhaps.  Munchkin is keeping herself busy and has left me to my own devices.  I was excited that today was THE day for transformation of the rice koji into miso; afterall, we did soak black beans in preparation and the big pressure cooker was cleaned and readied for action.  However, upon close examination of the inoculated rice grains, I made an executive decision and decided to go for another twenty-four hours.  The soaked black beans have been transferred into the freezer until the time is right.

While nicely colonised, cracking the rice grain open showed that the mold could still penetrate the grain a bit further.  Also, deep inside my gnomish heart, that mad, self-sufficiency streak wants the Aspergillus mold to start fruiting (ie. make spores) so that I can collect the yellow-green spores and replenish my supply for future batches.  While not impossible to bring into Belize, the starter cultures are difficult to order and then ship into the country without some hoops having to be jumped through (I’ve got a friend in Japan who feels like he owes me a favour but I don’t want to collect on his good will yet!).  Being able to harvest my own spores would free me from this dependency on factors that I don’t have control over.  Let’s see if I can pull it off…the plot thickens…

Colonised Rice Grains...not quite ready.
Colonised Rice Grains…not quite ready.

It is hard to assuage Fermentation Frenzy once it grabs hold of you so I had to find something to still my trembling nerves while waiting for the koji to continue its colonisation.  I finally decided to rack some mead that has been sitting around settling and aging…I had been dissatisfied with the way this batch has been clearing and decided to do something I usually don’t do:  use some gelatin finings to try and clear it a bit more.  I was concerned that perhaps it had not cleared well because of contamination and doing this would also afford the opportunity to have a quick taste.

Racked Mead with Finings Added.

This accomplished, the moment of truth arrived:  the presentation of a slightly cloudy glass of non-carbonated mead to the tasting expert, Munchkin.  Fortunately and happily (for both of us) the sampling test was passed and I received a smile of approval from Missus Munchkin!  Yosh!

The Taste Test.
The Taste Test.

Can’t wait to see what happens tomorrow!  Cheers to all!

(Summer!) Miso Madness III.

Gnome.Self.SatisfiedIt continues to be hot, dusty and windy…in Sardinia we would say that we are afflicted with scirocco, that wind that comes from the Sahara and North Africa…it feels very similar and makes one feel terribly miserable.  Yes, you guessed it, headache is back today.

However, my life is not only bearable but actually exciting…the Spirit of Aspergillus has taken residence in the carefully prepared rice and the next twenty-four hours will lead to our desired goal…rice koji!

It is always nice to open the bundles and inhale the fruity, mushroomy bouquet of a successful inoculation.

The opened bundles.
The opened bundles.

The rice grains are covered with a white, cottony growth and you can feel the “live” heat (like having a cat on your lap) emanating from the rice.  Everything needs to be transferred into bags as it will overheat and spoil if kept in a bundle.

Rice divided up into six 10 pound bags.

Time to flatten it all up, stick a temperature probe in and wait another twenty-four hours.

Nice neat stacks.
Nice neat stacks.

Keep an eye on the temperature…the bags make it easy to spread everything out if cooling is necessary (especially since I’m doing this in “summer” and you’re not supposed to ;-p).

Keeping an eye on the temperature.

This link takes you to the more detailed instructions I’ve written in making rice koji in the Bored-in-Belize Library if you ever want to do this yourself:  Making Rice Koji.

Since we already know that we will be making some shinshu miso from this batch of rice koji, we’ve started the preparation of the beans:  cleaning, washing and soaking overnight.  We use black beans and not soy beans because a) they (soy) are harder to find and b) we are making Belize/Central American shinshu miso and we want to remain culturally appropriate.

Black beans for making miso.

More tomorrow…

Miso Madness II.

Gnome.Pushing.Up.GlassesCor blimey it’s a scorcher today!  I suddenly feel very relieved that I am on restricted duties.  The sun is blazing down, the earth is developing big cracks and the ducks, who normally can’t be bothered to walk the two hundred metres to the pond actually went for a dip to cool off and clean up.

Hard core miso purists will probably look at this post and scoff at me for trying to make miso in “summer,” so to speak (dry season here is like summer), since you are supposed to make it in winter because …….. (fill in blank with the usual stuff that poncy, purist, fundamentalists say when they are trying to put you down and show how much smarter they are than you but I digress…).  So, anyway, this is day two of Miso Madness (made in the summer, ha, ha, ha!):

Yesterday’s rice was soaked, drained and steamed.

Overnight-soaked rice being drained thoroughly.
Loading bamboo steamers with rice.

Then the cooked rice had to be spread out and cooled before inoculating with the right Aspergillus mold.

Cooling cooked rice.
Mixing mold spores into cooled rice.

The most pleasurable part of the process is making the final bundle to incubate the rice and get one step closer to rice koji.

The finished bundle.

Tune in tomorrow for the next stage in making rice koji…