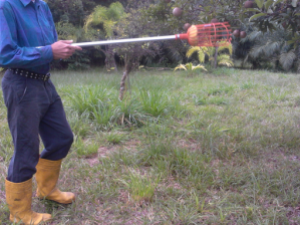
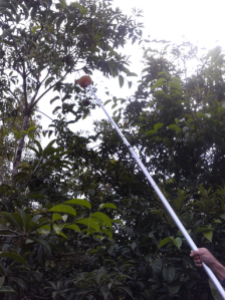
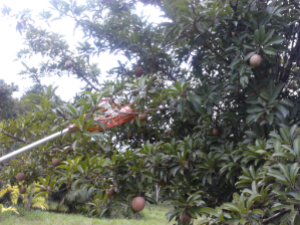
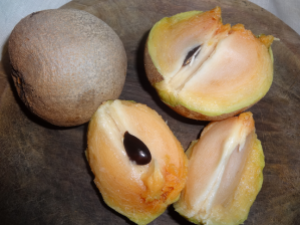
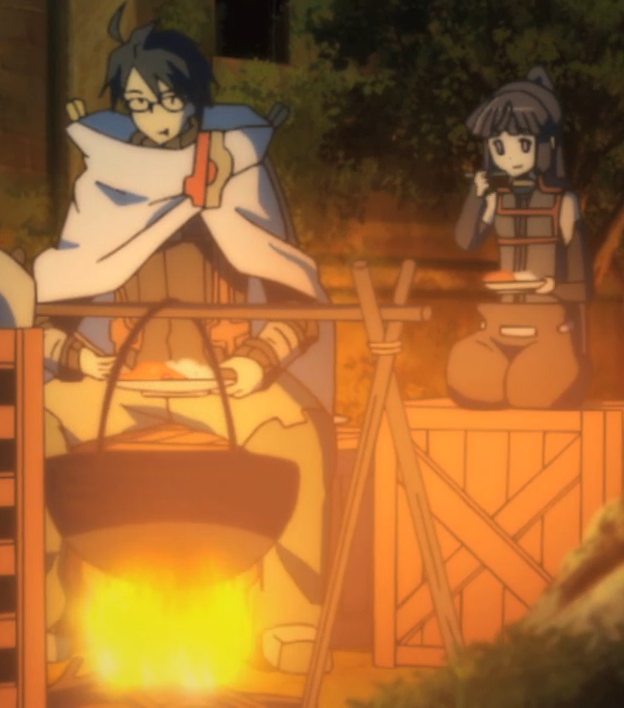
Sapodillas (Manilkara zapote) are in season again and this year we have a bumper harvest. The fruit has a very sweet caramel-honey taste. We have been picking them every morning. For an inexperienced picker, the ripe fruit forms a taut and shiny appearance. At first it is difficult to spot but after picking hundreds of them you can get the hang of it. Here is a picture of Gnome ready for action on the farm!
Gnome Armed With Fruit Picker.Picking Sapodilla.Picking Sapodilla!
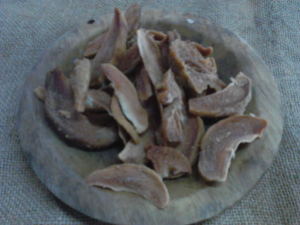
This year, we are going to sun-dry some of them. We like to eat them with beef jerky!
Dried Sapodilla.
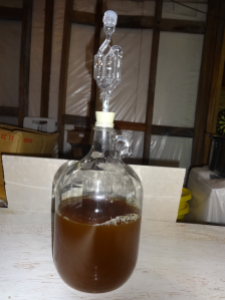
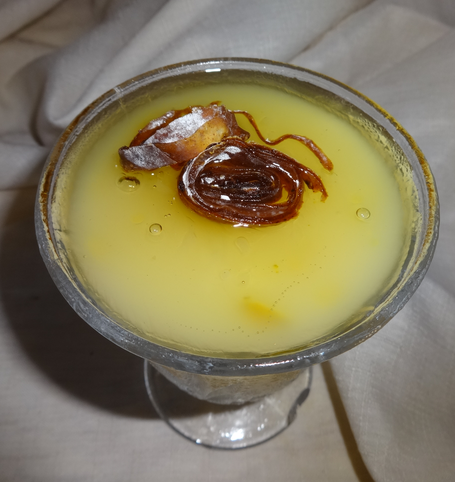
Some more sapodilla melomel would go down nicely!
Sapodilla Melomel.
Oooooh, so many to pick and so much to make!! We will of course eat some of them too…
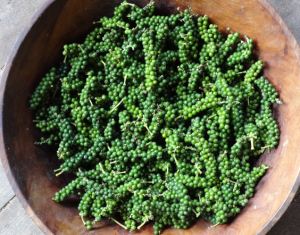
This year we decided to process our pepper into white pepper. Usually, we just pick them green…
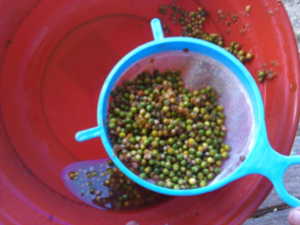
Harvested Green Peppercorn.
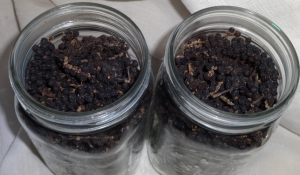
And as they dry out in the sun, they become black peppercorns.
Black Pepper.
Because I mostly cook Chinese food, white pepper is actually more useful for me from a culinary point of view. The preparation of white pepper requires a bit more work. This is what you do: Pick the peppercorns when they start turning red:
Picked Peppercorn.
Then place these peppercorns in water to let them all ferment. After a while, the water will get bubbly and murky. Each day, dip your hands in the water and rub the peppercorns with the palms of your hand. This “retting” procedure loosens the outer shell to release the white peppercorn. Do this for 7 days…you can throw away the outer shells each day but leave the white peppercorns to ferment and do their magic. It all gets rather smelly but hey, I think it is really important to understand the value of doing things yourself. Now I know why ground white pepper costs $30 Belize Dollars per pound and I will no longer complain about the price!
On the 7th day, drain off all the water:
Processing White Pepper.
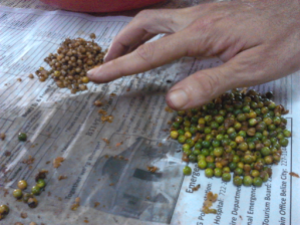
Separate the white peppercorns:
Sorting White Pepper.
You will find that the peppercorns are at different stages. Remove the white peppercorns and let them dry out in the sun. The rest of the pepper (which still has the outer hard shell) can be placed back in a clean bowl of water. At this stage, you can add newly harvested pepper to repeat the 7 day process of fermentation again.
So there you go. You will find that when you consciously spend the time and energy in processing your own food, it becomes a matter of necessity. It isn’t about economics anymore…it’s about eating good food that money can’t buy.
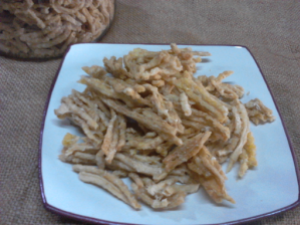
A couple of weeks ago we harvested fresh cassava from the farm to make “Cuppa Cassava” which is our own home-made version of an instant noodle meal. As described in an earlier post, we prepared the root by peeling, cutting into pieces and steaming. After that, we put the cooked vegetable through a meat grinder in order to homogenize it and obtain a “noodle-look.” Then it was placed in the sun to dry for three days.
Instant Cassava Noodles.
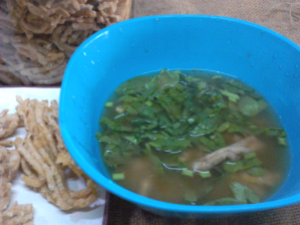
We made an “instant” quick meal by adding boiled water (about 1+1/2 cups) to a handful of dehydrated cassava noodles; we covered this and allowed the vegetable to soften and cook for 10 minutes. At 7 minutes, a teaspoon of miso (our famous Peach Palm Miso) and a 1/4 cup of finely chopped green spinach were added to the mixture. And Hey Presto…Cuppa Casava Ramen was ready to eat!
Cuppa Cassava Ramen.
The cassava noodles had a chewy, firm texture with a bite. We both agreed that this was a good preservation method and this was definitely worth having in the pantry as “farm-made fast food.”
We spent the day processing cassava since we had received a big burlap sack of this “ground food” as a gift. We also added our own cassava to this…our type is the esteemed yellow variety which has the hearty taste of wholesome potatoes. Altogether we probably had about 10kgs (22lbs) of fresh vegetable.
Cassava Roots.
As soon as you harvest cassava, it should really be eaten or processed within 24 hours. Otherwise, they start going bad quickly and become discoloured. When freshly dug up from the ground, the outer part peels off easily.
Peeled Cassava.
After peeling and washing, we cut the root into inch size pieces and steamed them in bamboo steamers placed in our mega-sized pressure cooker.
Steaming Cassava.
Next, we put these cooked cassava pieces through the meat grinder to get them into a soft pellet-like consistency. We put this out to sun-dry this afternoon and will probably continue this for about three days until they get bone dry. We will end up with about 1kg (2lbs) of dried material. After that, we are going to experiment with the dried ingredient. We are hoping that the dried cassava can be re-hydrated instantly with hot water to give an instant “cuppa cassava” meal (like instant ramen noodles)! Great for packed lunches and On-The-Go!! Wow…it takes three days to make an instant meal…too funny!!
Hello Everyone!! It is Friday again so you must be all out having fun! Here are some pictures from the farm:
Today we harvested our gourds which Gnome will be using to make me a dinner set (GnomeWare TM). It will be a six month wait for them to completely dry out before he can even start doing anything with them.
Bunch of Gourds.
It has been frightfully hot lately so I have been drying breadfruit out in the sun. I had cut the breadfruit into fair-sized chunks of about 1cm (1/2 inch) and it took about three days for them to get to a very hard dehydrated state.
Green Breadfruit.
Dried Breadfruit Pieces:
Dried Breadfruit.
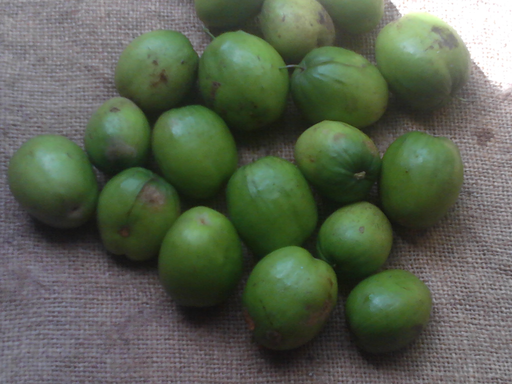
We have these really tasty fruits in season which are crunchy like apples. This is Ziziphus mauritania, otherwise known as Chinese apple, Indian jujube or Indian plum.
Chinese Apple.
We are just eating them green right now. They are also edible dried and actually dry into Chinese red dates which are used in Asian cuisine.
Between the two of us, 172 bananas in this huge bunch, is quite a bit to get through.
Bunch of Green Bananas.
This bunch was so heavy that it broke off the tree and we found it on the ground on Saturday morning. If you want to eat green bananas, you have to start eating them quickly, or else they start ripening within 7 days.
Luckily, the weather has been hot and dry this week, so I have been able to process the bananas for sun-drying.
This is what I have been doing the last three days. I have been grating them with this neat grater that I found in the Taiwanese store near Belize City.
Grating Green Banana.
The grated bananas just need a full 8 hours in the sun to dry completely. I have been processing 50 bananas a day which fills up a gallon jar once dried.
Fifty Dried Green Bananas.
So, by the end of today, I will have three gallon jars of dried banana. In my experience, each jar is equivalent to 20 meals and so in total, I have 60 meals in all. That is what I call food security!
Dried banana can be re-hydrated to make porridge, rostis, fritters, fillers for sausages, vegetarian bean burgers and much much more. Furthermore, this dehydrated stuff can be ground into fine flour for making breads, biscuits and pastries. This dry form is so versatile! I will post up recipes as I start cooking with it.
One last thing…this big bunch of bananas would retail at about $20 (USD$10) in this country. $20 gets you two meals of rice and beans with stewed chicken, which is typical Belizean food fare. To me, it really makes a lot more sense to go through the extra labour of processing the food so that I can get 60 meals out of it all. It’s also a labour of love…home-cooked food is always the best!
Making Coconut cream and flour involves quite a few steps, a little muscle, time and diligence. When you do everything from scratch, you realise the value of what you are actually making. The making of the cream and flour go hand in hand as you will see from the following steps:
Firstly, Gnome has to climb a coconut tree to harvest and then he de-husks them. Next, he splits them in half and grates the flesh with a shredder attached to a hand-drill.
Grating Coconuts.
The next step is to squeeze the liquid out of the coconut. I usually add some boiling water to the coconut and I squeeze the shredded coconut through a muslin cloth to get all the milk and cream out. This is done in small portions in order to maximise the quantity and once all the milk/cream has been extracted, the shredded coconut is placed in trays and laid outside to sun-dry.
Coconut Meal Ready For Drying.
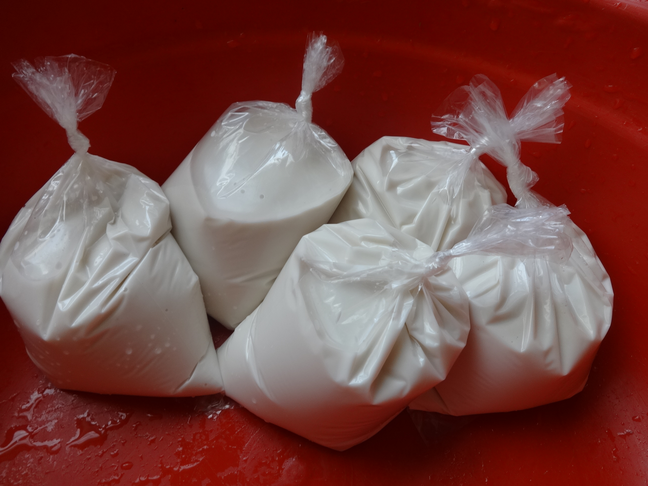
Meanwhile, the liquid is placed in the fridge and as it cools down, the milk separates to the bottom and the cream forms a layer a the top. The cream is skimmed off the top, a number of times, and poured into these bags for selling:
Coconut Cream For Sale.
Each bag contains the fresh cream of one coconut. Belizeans like to cook rice with this; a Belizean cook in Punta Gorda told me that he just needed one of these bags to cook a 5lb pot of rice. Another great way to use this cream is to indulge in a pina colada or blend with fruit to make a yummy coconut “shake.” You can even use it in bread making to give a silky texture to a loaf.
Usage and Storage of Coconut Cream:
Our coconut cream is sold in the frozen state. Store in the freezer. When you are ready to use, simply use it in the frozen state. If you only require a small amount, cut off a chunk with a knife and store the remaining cream in the freezer. The shelf life of this product is 6 months if stored properly in the freezer.
Anyway, back to the shredded coconut; it takes about 6 to 8 hours for it to completely dry in the sun. Once dried, the coconut is put through a stone mill to grind it into flour. You end up with a fluffy meal which is perfect for breads, pancakes and muffins and it is has the added bonus of being gluten-free.
Coconut Flour.
The coconut flour has a nutty flavour which adds texture to all kinds of foods. 1lb (454g) of this flour contains the meal of about 6 to 7 coconuts.
Usage and Storage of Coconut Flour:
Coconut flour is highly nutritious so should be stored in the refrigerator or freezer. The coconut flour can be stored in the fridge for up to 2 weeks. Otherwise, it can be stored in the freezer for up to 6 months. We usually deliver this product in the frozen state; in order to thaw this product, simply place in the fridge for 24 hours.
We are currently selling coconut cream, stone-ground coconut flour and rice flour within Belize. The coconut cream can only be sold within Punta Gorda. However, flours can be transported anywhere within Belize. Please check out The Apothecary for our Health Food prices.
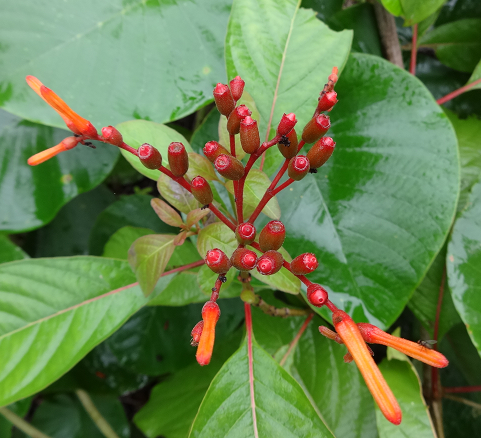
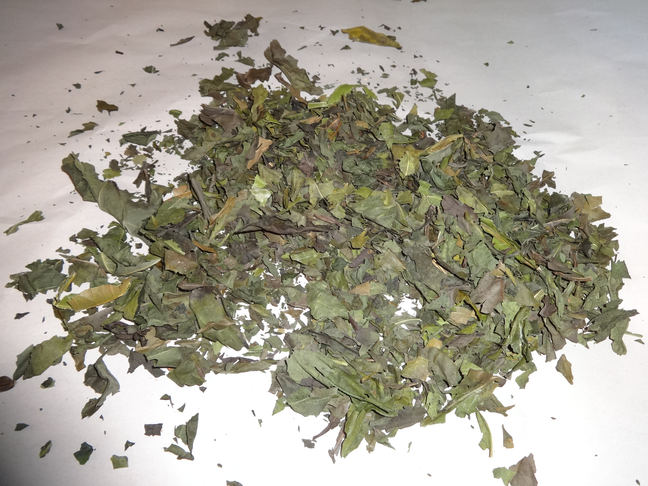
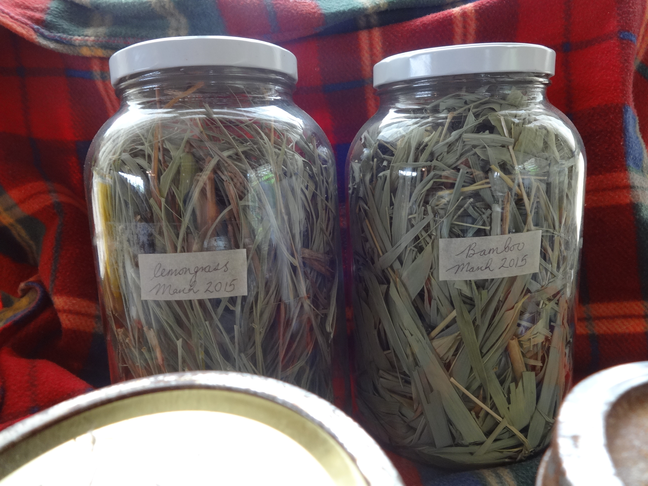
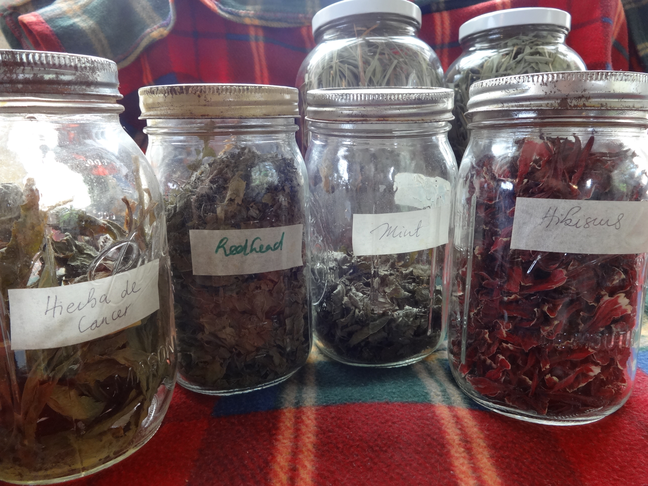
As Gnome would put it, “Biomass is a Bitch!” and I truly agree with him, after the amount of work I have done in gathering medicinal herbs to dry. As mentioned before, we are working in partnership with BotanicaBelize to produce a line of facial products. One of the products is a facial tea which is jam packed with an array of medicinal herbs and plants (according to the season in which they are picked). This entire week, I have been picking Red Head (Hamelia patens), Plantain, Bamboo, Hierba del Cancer, Lemongrass, Hibiscus (Sorrel), Sage, Basil, Chanca Piedra, Noni Leaf, Mint, Culantro and Jackass Bitters.
Hamelia patens or Read Head.Fresh Chanca Piedra.
And it is not just a few plants here and there as I gaily skip from one plant to the other. No, it is actually a real labour of love where I gather bunches and bunches of each plant in a wheel barrow. I sweat and I use muscle power (Munchkin Power!). You will not believe the amount of fresh stuff that I have had to harvest to get a final dry weight…for every 2oz (60g) of dry weight in material, I have to gather 1.5 lbs (600g) of fresh herbs! And this is dried noni leaf…about 2oz dried.
This was 600g of Fresh Leaf!
So, when you buy any dried tea like chamomile or mint, to give an example, each teabag is actually 1 oz (30g) of fresh herb. It is totally mind-boggling…plus a lot of work if you do it yourself!
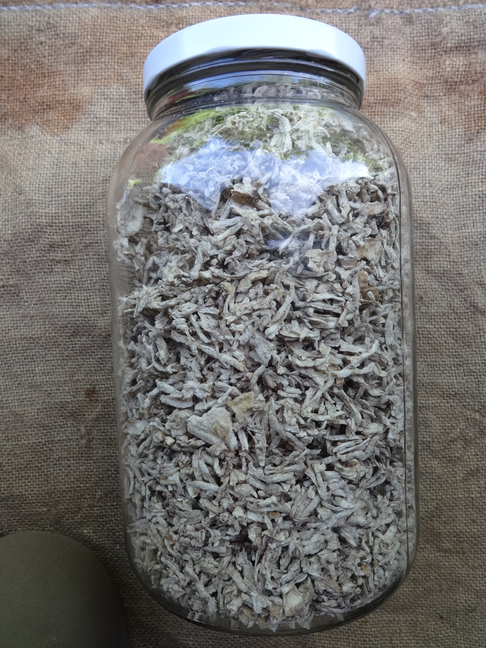
Anyway, I am glad I have done it! It is nice to hoard everything in jars to display:
Jars of Herbs.More Jars of Herbs.
Yay!! I managed to get all the herbs gathered and dried in time, despite Gnome’s frenzied time with Miso (!) Everything is All Right and I managed to finish off all the drying process this afternoon despite a surprise early afternoon blustery storm.
The days are becoming hotter and drier, with rains becoming fewer and far between. This is the time to harvest anything that you can get your hands on and dry it.
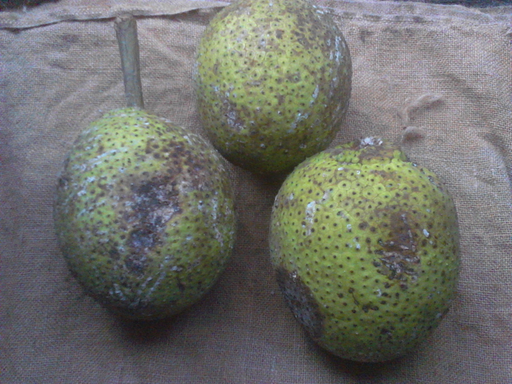
Sapodillas are still in season:
Sapodilla Fruit.
We have gathered quite a bit to sun-dry.
Dried Sapodilla Fruit.
When dried, they make a very good substitute for dates; they are intensely sweet and would be good for baking. Gnome will be making mead with dried sapodilla…watch this space!
We have also been drying orange peel:
Dried Orange Peel.
Dried orange peel can be added to savouries like stews, curries and soups to impart a warm, orange flavour. It can also be ground up and used in cakes and breads. It is extremely versatile and uses up something that you would normally throw away. I hate to waste anything, especially when it involves something edible! Look out for my recipes which use orange peel:
Sapodilla Curry with Venison.
You will find this recipe in Belize Wild Recipes; this one is an orange peel curry.
Okay everyone, start sun-drying all your fruits now!!
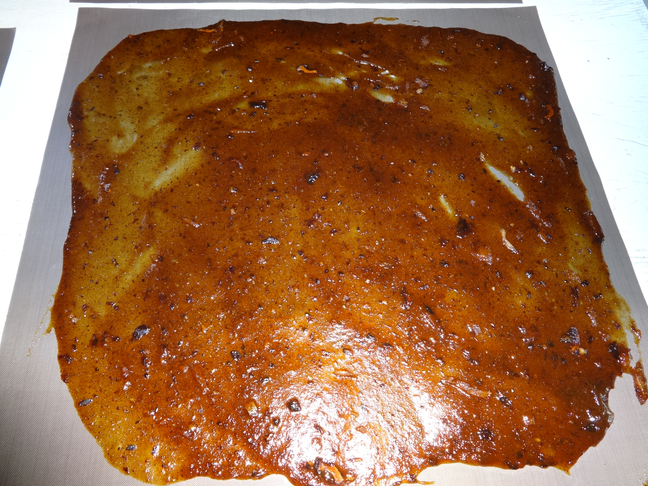
Here’s one for the Festive Season. I have taken a Tropical Fruit called “Sour Peach” and made a Christmas Fruit Leather with raisins, cinnamon and cloves. Here in Belize, the days are hot and dry so it is the perfect time for sun-drying food outside.
Christmas Fruit Leather.
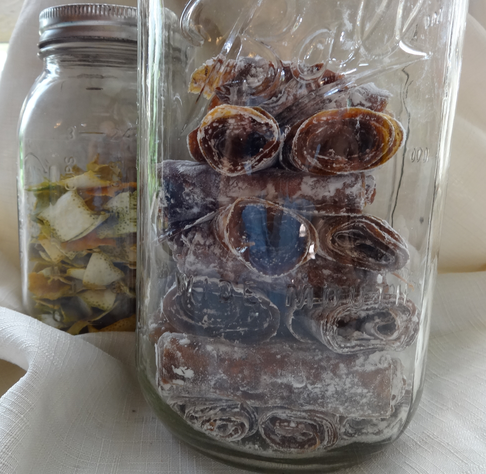
Sour Peach imparts a tanginess to the taste of the leather which gives a “sweet and sour” taste. It takes about 2 to 3 days for it to completely dry. After this, it is dusted with cornstarch, cut into lengths and then rolled into Yule Logs.
Fruit Leather Yule Logs.
These Yule Logs are very versatile and make a great garnish for desserts and puddings. The rolls can be sliced and used as a topping:
Fruit Leather Garnish.
They can also be served whole with turkey or ham as an interesting, tropical accompaniment to traditional Christmas fair.