Category Archives: Farming

Tuesday Night Storm, Internet Down and Pineapple Melomel.

Together.SmilingHello There!!  I will try to catch-up with this post and bring you up to date.  On Tuesday night we had a scary, gusty storm that resulted in a power-cut for most of the night and of course, the Internet went down with it.  The storm has brought cooler weather with grey clouds and it even rained heavily this morning.  The Internet started up again today…yay…it is so insidious how we feel that “we need Internet” and life just isn’t the same without it. When I down-loaded my bunch of late emails, they weren’t all that exciting and most of them were spam, anyway!

Well, since it was a Rainy Day, we made Pineapple Melomel (mead with fruit).  Yesterday, I had bought 20 ripe pineapples from the market for BZD 30.00 (USD 15.00) in an attempt to excite Gnome into making some more booze (nice, sparkling, champagne-like stuff) for me.  After I got the pineapples loaded onto the truck, he gave me a whiny look and said that he was hoping that I had bought the plantains instead of the pineapples.  That remark got him a “Chinese Woman Look” and stopped the complaints quick smart.

This is what we did.

We removed the heads and scrubbed them in the sink:
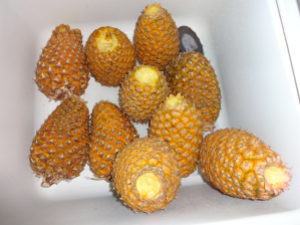
Washing Pineapples.
Washing Pineapples.

I then started chopping up the pineapples.  Whilst I was doing this, I kindly asked Gnome to take some pictures of this process.  All the pictures were soooo baaaad!!  They were out of focus and made my hands look stumpy and small…or, are they really like that?  I had to re-take some photos:
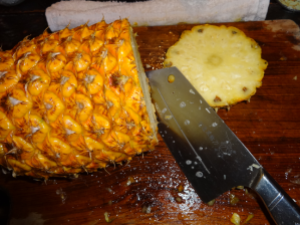
Chopping Pineapples...Look No Hands!!
Chopping Pineapples…Look No Hands!!
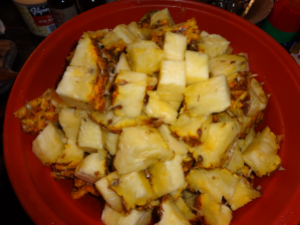
Pineapple, Chopped.
Pineapple, Chopped.

Gnome put the pineapple chunks through the juicer to get the juice and the pulp:
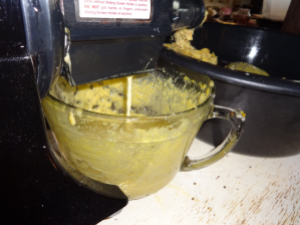
Juicing Pineapple.
Juicing Pineapple.

We ended up processing 10 pineapples in all because it was actually a lot of work and the juicer was over-heating and complaining with the work-load.  So, we managed to get about 6 litres (1 and 1/2 gallons) of juice from it all.
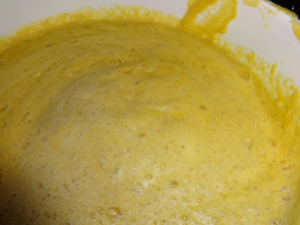
Frothy Pineapple Juice.

We got an extra 2 litres (2 quarts) of juice from the squeezing of the pulp:
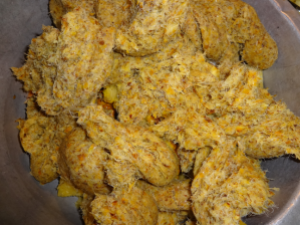
Squeezed Pineapple Fibre.

We waste nothing!!  We gave this and some pineapple peel to the duckies this morning.  It was a Pineapple Feast…look closely at silly white duck…he even has a bit of pineapple stuck to his head.
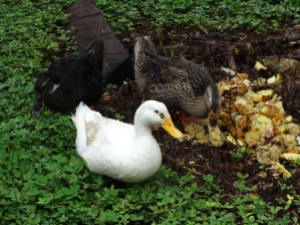
Pineapple Fest For Duckies!

We have noticed that our duckies are totally neophobic with food unless it is yellow in colour.  So, I was received by joyful and frenzied quackings today when I brought out the basin of pineapple waste.
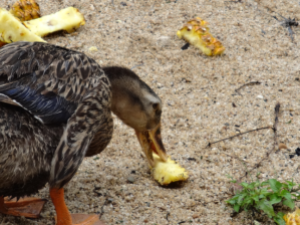
Duckie Eating Pineapple.

While I was out playing with the duckies, Gnome proceeded with the making of his pineapple melomel; honey and fresh Toledo rainwater (very fresh!) was added to make the batch up to 5 gallons.  Gnome will be posting up the recipe in Bored-in-Belize over the next few days.

Heating Melomel:
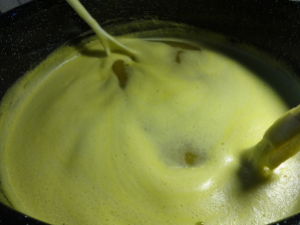
Heating Melomel.
Heating Melomel.

Yes, I know…it all looks very yellow (just like all the other pictures) but believe me, this will taste great!  Tomorrow, we will be processing the rest of the pineapples and adding honey and fresh ginger.  In the words of Gnome, “Make it a Metheglin.”

Home is Where the Heart Is!!

Together.from.FrontThis whole week we have been running back and forth to another farm because we were asked to do tests on the grapes. It has been a real organisational week trying to fit in the tight schedule on our farm with driving out at designated times and days.  I have learned more about grapes in one week than I have ever in my entire life; the tests that we did were Brix or Specific Gravity which is sugar level, pH which is a measurement of acidity or alkalinity and TA (Titratable Acidity) which is a measurement of all acid, even in the bound form.  All these tests are helpful in determining an ideal picking time for grapes in order to make wine.

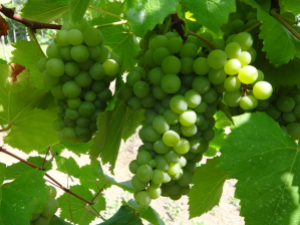
Ripening Grapes.
Ripening Grapes.

We had to conduct the tests all week so that we could determine a trend and then consider the perfect harvest day, the last test date was Friday morning…what a day!!

Together.Griffon.Head.UpWe got up early in the morning to brush-mow, do coconuts and all our usual stuff.  The heat was on…by 9am we were in the car zooming off to collect grapes and then back to our farm to do the tests.  After that, we were on the road again…to Placencia this time for a Birthday party.  Phew…it was just non-stop!!  We gave our friend a gift of Gnome’s Home-made Mead with Happy Birthday Commemorative labels!

After the Birthday party, it was another two hour drive back to Toledo.  By that time it was getting dark so we had to get back to the thinking about the grape picking again.  From our results we had determined Sunday as the harvest date and so we wrote a schedule up en-route back to Toledo.  We were so tired, on the road, and did not feel up to it but nonetheless we organised a run down of events.  Gnome said that it was important to make a  schedule because it involved so many different jobs which had to be co-ordinated at the same time.  To Gnome, it was about efficiency of time and so he didn’t want all of us sloppily trudging about with buckets of grapes in an aimless, meandering sort of way.

Anyway after a whole week of running around and testing grapes, the harvest was cancelled.  We kind of felt a bit of an anti-climax after all the energy we channelled into it.  Partly because of that, we lost our momentum and fell crashing into a heap of exhausted tiredness today.  We slept all day…I was so tired, I was blowing bubbles!!

Munchkin.Another.Silly.Shot

We feel a bit more human now and have recovered some of our energy.  Glad to have spent the whole day on the farm without needing to leave.

“Home is where the Heart is” …this was affirmed by the birth of two new piggies in the maternity ward; this morning we were greeted by mother-piggy licking and cleaning up her brand new babies!  Mayor Gnome gave the mother and new piggies his blessings and then promptly fell asleep…with a smile on his face!

Mayor Gnome Exhausted.

Sunday Harvest, Ripe New Piggies:

Blanc du Bois and Cab-Sav.

Brix level 24 = super sweet!! (wine joke).

Mayor Gnome gave a gift of grass; triple grass like “triple salad.”  All Paradise Piggies were rejoicing and weeweeing in unison.  Mayor Gnome is well on his way to another term.

Mayor Gnome.  Harvest Time. Reaping the Rewards of his Hard Work!
Mayor Gnome. Harvest Time. Reaping the Rewards of his Hard Work!

It Is Time for More Bees: The Gnome Mark II Bee Hive!

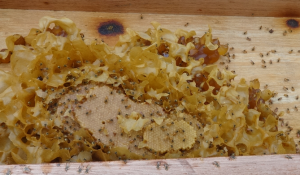
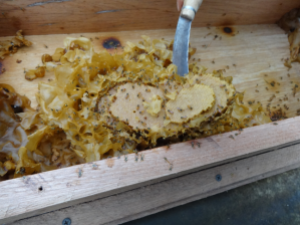
Gnome.With.BoxAbout a week ago, I opened up my stingless-bee, bee-hives to check up on the little darlings and discovered that in one of the hives the bees had started to build brood comb in the honey pot storage area.  When I saw it, it was about half the size seen in the photo below.  It doubled in size in a week!

Brood Being Built in the wrong place.  This is where honey is supposed to be stored!
Brood Being Built in the wrong place. This is where honey is supposed to be stored!

Out of curiosity, I got in closer to have a goosie:

Brood Comb Being extended with honey and pollen pots visible in the periphery.

It would appear that the bees have built an auxiliary brood area with new queen and everything in the middle of the honey chamber, co-existent with the original brood in the brood chamber with its own queen; so, two hives in one.  I hypothesise that this is due to the depth of the honey chamber (which is currently set at 2 3/4 inches).  The honey pots are about 1 inch tall so it is obvious that there is plenty of volume for a “nest” of brood comb even over a layer of honey pots.

I decided to test this hypothesis by reducing the depth of the honey chamber to 1 1/4 inches.  Here is the new hive, which I have called the Gnome Mark II Modified UTOB Hive:

The New and Improved Gnome Mark II Modified UTOB Hive.

Compared to the original UTOB Hive:

Original UTOB Hive.
Original UTOB Hive.

I admit, not a Mind-Boggling Difference but putting it together in Dry Season Super Heat Time made me feel like it was something amazing and deserving of its own name!

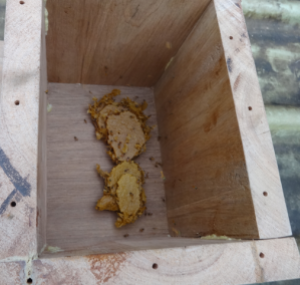
Anyway, I took the “extra” brood out and put it in the brood chamber of the new hive:

Transferring Brood from the Old Hive.

…Into the new hive:

Brood Placed in the New Hive.

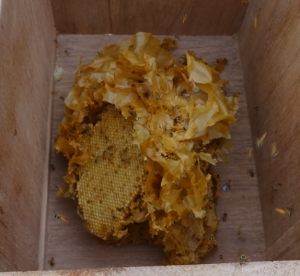
Here’s another shot after more brood was moved over:

All the Brood Moved to the New Brood Chamber.

And that was that, all the hives were sealed up and put into their places.  Now it is time to wait another month or so before checking on them again…

I love stingless bees!

Gnome.with.Drink

Doing Gnome Stuff: Ballistic Testing.

Gnome.With.BoxIt has been a day for doing some Gnome Stuff; in this case, Ballistic Testing of Three Different Pellets.  Here is a picture of them:

0.117 Calibre Pellets Tested:  Hollow Point, PBA, 10.5grain Domed.
0.117 Calibre Pellets Tested: Hollow Point, PBA, 10.5grain Domed.

The testing materials used were three aluminium bottles filled with water, the sort used to carry specialty oils and a cocoa powder can.  The bottles were set at thirty yards, like so:

Bottles filled with water and set in the test field.

And the can was set at sixty yards, hanging off of a tree.

The first thing that can be seen from the above photo is that the rightmost bottle was knocked over by the shot with the heavy, 10.5 grain domed pellet.  The entry and exit holes for this pellet:

Entry Point for 10.5 grain Domed Pellet.
Exit Point for 10.5 Grain Domed Pellet.

The PBA pellets make a very impressive crack, almost like a real firearm, as they break through the sound barrier.  These are their photos:

Entry Hole for PBA Pellet.
This is the embarrassingly bad photo of the deformity at the back of the bottle, ie. it didn't go through.
This is the embarrassingly bad photo of the deformity at the back of the bottle, ie. it didn’t go through.

The lead hollow point pellets also break through the sound barrier and are only slightly heavier than the PBA pellets.  They showed similar results:

Entry Point for Hollow Points Pellets.
Entry Point for Hollow Points Pellets (yes, another bad picture).
The Hollow Point also did not go through the bottle either (I know, I know, the pictures are getting really bad...but Munchkin didn't take these, I did).
The Hollow Point also did not go through the bottle either (I know, I know, the pictures are getting really bad…but Munchkin didn’t take these, I did).

As an additional note:  the can set at sixty yards and hit with the 10.5 grain domed pellets, fared like so:

Can.at.sixty.Entry.Heavy.Domed
Entry Point for 10.5 grain Domed Pellets.
And the exit point (Yay, I can actually see this one!!).

There are no photos of the can for the other two pellets because I couldn’t hit the can with three shots…presumably the accuracy of the other two pellets isn’t as good as the heavy pellet, which hit the can in one shot.

These are interesting results.  The heaviest pellet happens to be the cheapest but appears to go through everything shot at in this test and also seems to be the most accurate at the longest distance.  While the other two pellets are more expensive (the PBA pellet almost ridiculously so), they would not go through the metal bottles and did not seem to have long distance accuracy.  This is probably of no consequence for plinking (expensive plinking, mind you) but for hunting, the heavier weight and improved accuracy of the domed pellet may be an advantage in stopping something a bit bigger (and yummier!).

Laters Everyone!! 😀

Nobody is Reading Our Stuff (and it’s hot).

Munchkin.Another.Silly.ShotI am feeling a bit disheartened because I think I am writing at a brick wall.  As usual, I try to write a post everyday but my Stats keep on dropping.  Persistence is supposed to be the key so I will endeavour to keep on going…

It is also soooo hot here in Belize!!

Gnome.Yet.AgainAnyway, today Gnome racked the Melomel because it had stopped bubbling (or talking) to us.  We had a quick taste…it was bright orange from the sapodilla and carrots…and it tasted rather orangey.  Let’s see how it will evolve.  He also put the last of the koji beans in jars in an attempt to make Chinese fermented black beans.  We can’t find a recipe anywhere for this so we have decided to add salt to it in a jar and let it keep on fermenting.  The fermentation area has been cleared up to make way for start of our soap marathon and so we shall be making a batch of chocolate soaps tomorrow.  Gnome also removed the last of the barbed wire fencing which had been originally constructed for the division of large animals on the farm.  We are not even going to pretend any-more…we are fine with small things like guinea pigs!

Munchkin.Upsidown.UpsetWell, I have developing more products for BotanicaBelize; this time it is Mens’ facial products.  It was so hot!!!  But, alas I did muster enough creativity, despite the heat, to make some nice products.

One day at a time…

Together.from.FrontI would like it to be fun all the time but sometimes the sweaty, horrible heat gets in the way!!

The Trouble with Coconut Water!

Munchkin.Sitting.DownOn our farm, we have a coconut plantation and you would think that it would be quite the thing to sell coconut water with fun and profit in mind.  The reality is not the case as we have discovered because there are so many considerations that make you stop and wonder whether it is all worth it or not.

The first thing is cost; here in Belize, people expect to pay between BZD0.50 to 1.00 for a fresh water coconut which gives an average yield of 150 to 200mls (5 to 6.6fl/oz) of coconut water.  Belize manufactured coconut water can be bought for 500mls for about BZD2.00 (USD1.00).  So, it is rather cheap and affordable as you can see from the prices and making a grand fortune from the sale of water coconuts was never possible but we decided to sell a couple of gallons on a weekly basis just to stimulate our daily maintenance of the coconut plantation.

In doing so, we realised what it actually meant to process coconut water and all of the pit-falls involved from the cutting of fresh coconuts to preservation and selling of the water.

Coconut Palm.
Coconut Palm.

Firstly, coconut trees have to be climbed by Gnome and  20 to 30 coconuts (most of ours are medium sized) give one gallon (3.785litres).  The coconuts are cut open by slicing through the husk and the shell with numerous deftly cuts with the machete whilst you hand is holding onto the coconut …you need to watch your fingers… and then, the water is poured into a bucket.  The water does get detritus from the coconut shell so it is then filtered through a muslin cloth.  At this point, it needs to be freshly frozen as the nutrient-rich liquid is the perfect medium for bacterial multiplication.  After de-frosting fresh coconut water, it should be consumed as quickly as possible (2-3 days in the refrigerator); at room temperature, in the Tropics, it will start fermenting within 2 hours.

I am sure that you all know, fresh coconut water has an unrivalled taste of sweetness.  This is another one of the challenges that we face in processing our coconut water…we have to freeze it in order to preserve it but freezing it makes it less sweet.  At this point, I would like to thank Adriana Guzman for independently noting this fact.  We tested her observations and also found that the thawed coconut water tasted as if it had been diluted with water.

It was then that we came to the important realisation that shop-bought coconut water must be one, treated for preservation (probably a combination of pasteurisation and addition of preservatives) and two, sweetened to overcome the loss of sweetness due to the preservation process.  This is why it never tastes like the real thing.  The only way to get the true, natural taste is to have your own stash of fresh coconuts and be willing to cut them open yourself.

Full of Beans!

TogetherGnome was full of beans this morning and brimming with energy right from the get go.  He was out of the house by 5.30am with the brush-mower clearing the back of the farm.  I started cleaning buckets and basins, started a big pot of beans on the stove and washed sheets for koji making.  It was bean mania and the various bean preparations continued to exude beaniness into every square inch of the house.

When we finally met up again, Gnome had grated coconuts and I proceeded to squeeze the cream out of them.  I then laid out the coconut meal in the sun for the making of flour.

After this, it was back to the beans.  The night before we had decided upon making a “meatier” hatcho miso and so today we made Beef Jerky Hatcho Miso or as Gnome has coined it “Meat Lover’s Hatcho Miso.”  This involved putting 20 cups of fresh black bean koji and 2 lbs (1kg) of beef jerky through a meat grinder.

Beef Jerky Hatcho Miso.

There was a few cups of black bean koji left over so we decided to make a small batch of Taosi which is a Filipino fermented black bean preparation, made by soaking the koji in brine.

Taosi Fermenting Black Beans.

Next we took the freshly cooked beans from this morning and added more Aspergillus spores to start a continuous batch of black bean koji.  Our goal is to fill a 55 gallon drum with hatcho miso…more about that in a later post!

Making More Black Bean Koji.

We then had a brief intermission for food and refreshments.  For those interested, we still think that it is important to sit down and eat two proper meals a day, despite all the frenzy and excitement.  We had Chinese roast pork, pumpkins and shiitake mushrooms cooked in mead and sweet potato cakes.

Anyway, the next task was making Shinshu miso with the mountain of bungle beans from the freezer.  This was Gnome’s idea since I had been giving him such a hard time about the bungle.  Yes, we used up all the beans so problem has been solved.  We made 2 and 1/2 gallons of this…ready in one year!

Shinshu Miso.
Shinshu Miso.

Phew, it has been a bean marathon.  We were done by 2pm.

Munchkin and Gnome: Mad About the Beans!

On The Farm.

Munchkin.Another.LookThe whole house smells of bean juice with trays of hatcho miso and buckets of beans soaking in water.  At this point, all windows have to be opened or else one can get over-whelmed  by the fart smell of bean.  What better reason to take a look outside and tell you what interesting things are happening on the farm.

First of all, one jackfruit tree has started bearing this year:

Jackfruit on Tree.
Jackfruit on Tree.

We were not sure how to check for ripe fruit so we had to look up information on it; apparently, you can harvest them when they are green and to speed up maturity you can place it in the sun.  When ripe, the outer shell is suppose to crack with firm pressure placed on it.  Well, we have one of these babies getting a nice sun-tan outside and we can’t wait to eat it!  Jackfruit can get to a massive size (20kgs or 50lbs)…our are a modest 15lb (7kgs) in weight.

The kenep has just been flowering.  It has a lovely smell of vanilla which attracts honey bees.  Kenep fruit are similar to lychee in that there is an outer shell which you crack into with your teeth and then you bite into a thin soft flesh around a seed.  The great thing about this is that the seeds can be boiled and eaten.  So far, still no sign of fruit this year..

Kenep Flowers.
Kenep Flowers.

This is a grub that we found whilst digging around for sweet potatoes.  In Australia, they call them “Witchety Grubs” and traditionally they are eaten raw.  Gnome has eaten one before and said that it wasn’t that good…a bit over-rated!

Witchety Grub.
Witchety Grub.

We tried to throw this at a duckie and she looked at us in a “duckie” way…a sideways neophobic and partially horrified look…

Duckie Look.
Duckie Look.

Looks like she doesn’t know what to do with the Witchety Grub!

Making Coconut Flour and Cream.

TogetherMaking Coconut cream and flour involves quite a few steps, a little muscle, time and diligence.  When you do everything from scratch, you realise the value of what you are actually making.  The making of the cream and flour go hand in hand as you will see from the following steps:

Firstly, Gnome has to climb a coconut tree to harvest and then he de-husks them.  Next, he splits them in half and grates the flesh with a shredder attached to a hand-drill.

Grating Coconuts.
Grating Coconuts.

The next step is to squeeze the liquid out of the coconut.  I usually add some boiling water to the coconut and I squeeze the shredded coconut through a muslin cloth to get all the milk and cream out.  This is done in small portions in order to maximise the quantity and once all the milk/cream has been extracted, the shredded coconut is placed in trays and laid outside to sun-dry.

Coconut Meal Ready For Drying.

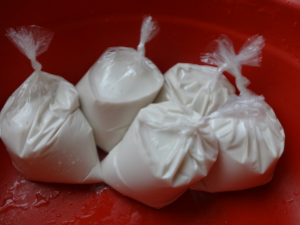
Meanwhile, the liquid is placed in the fridge and as it cools down, the milk separates to the bottom and the cream forms a layer a the top.  The cream is skimmed off the top, a number of times, and poured into these bags for selling:

Coconut Cream For Sale.

Each bag contains the fresh cream of one coconut.  Belizeans like to cook rice with this; a Belizean cook in Punta Gorda told me that he just needed one of these bags to cook a 5lb pot of rice.  Another great way to use this cream is to indulge in a pina colada or blend with fruit to make a yummy coconut “shake.”  You can even use it in bread making to give a silky texture to a loaf.

Usage and Storage of Coconut Cream:

Our coconut cream is sold in the frozen state.  Store in the freezer.  When you are ready to use, simply use it in the frozen state.  If you only require a small amount, cut off a chunk with a knife and store the remaining cream in the freezer.  The shelf life of this product is 6 months if stored properly in the freezer.

Anyway, back to the shredded coconut; it takes about 6 to 8 hours for it to completely dry in the sun.  Once dried, the coconut is put through a stone mill to grind it into flour.  You end up with a fluffy meal which is perfect for breads, pancakes and muffins and it is has the added bonus of being gluten-free.

Coconut Flour.
Coconut Flour.

The coconut flour has a nutty flavour which adds texture to all kinds of foods.  1lb (454g) of this flour contains the meal of about 6 to 7 coconuts.

Usage and Storage of Coconut Flour:

Coconut flour is highly nutritious so should be stored in the refrigerator or freezer.  The coconut flour can be stored in the fridge for up to 2 weeks.  Otherwise, it can be stored in the freezer for up to 6 months.  We usually deliver this product in the frozen state; in order to thaw this product, simply place in the fridge for 24 hours.

We are currently selling coconut cream, stone-ground coconut flour and rice flour within Belize.  The coconut cream can only be sold within Punta Gorda.  However, flours can be transported anywhere within Belize.  Please check out The Apothecary for our Health Food prices.

Grape Day!

Munchkin.ShoutingThis morning we visited a friend who is growing grapes on his farm-land.  The grape vines are only 12 to 18 months and are already producing abundant bunches.  It is truly amazing to see grapes actually growing in the Toledo region of Belize because our average rainfall here is lots… annual rainfall is about 4000mm compared to about 1600mm for Northern Belize.  When I think about grapes growing, I usually think of Mediterranean climates.  Anyway, it just goes to show that you can make things happen if you have discipline and patience:

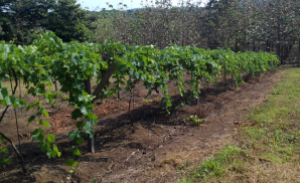
Row of Grape Vines.
Row of Grape Vines.

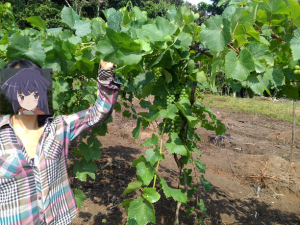
Another picture with Munchkin:

Munchkin and Grapes.

The grapes will be ready to eat in about 2 months…we will be re-visiting soon!

By the way, Gnome is going crazy with making another lot of Rice Koji today…and for the next 4 days!  He is unstoppable…

Fermentation Magic Continues.