HAPPY NEW YEAR!!

Dancing

To All of Our Friends, Our Enemies, Our Families, Our Readers and All of Humanity:

May we all have a year filled with wonder, success, prosperity and awe.  May all our wishes and dreams come true.  May we all discover freedom and brotherhood.  May the Fates smile upon all of our endeavours.

Please join us in welcoming the New Year by singing along with us with a good old Scottish favourite from Rabbie Burns (take your pick according to your inclination) while we share a wee nip of Scotch together:

Here are the Words:

Should auld acquaintance be forgot,
and never brought to mind?
Should auld acquaintance be forgot,
and auld lang syne?

CHORUS:
For auld lang syne, my jo,
for auld lang syne,
we’ll tak’ a cup o’ kindness yet,
for auld lang syne.

And surely ye’ll be your pint-stoup!
and surely I’ll be mine!
And we’ll tak’ a cup o’ kindness yet,
for auld lang syne.

CHORUS

We twa hae run about the braes,
and pou’d the gowans fine;
But we’ve wander’d mony a weary fit,
sin’ auld lang syne.

CHORUS

We twa hae paidl’d in the burn,
frae morning sun till dine;
But seas between us braid hae roar’d
sin’ auld lang syne.

CHORUS

And there’s a hand, my trusty fiere!
and gie’s a hand o’ thine!
And we’ll tak’ a right gude-willie waught,
for auld lang syne.

CHORUS

The Traditional Burns Auld Lang Syne:

Gregorian Auld Lang Syne:

And if you prefer Trance Auld Lang Syne:

Happy New Year from The Munchkin and The Gnome!!

Mashing, Lautering and Sparging on New Year's Eve.

Gnome.Far.Away.LookI’ve had to postpone brewing until today…it is amazing and unfortunate that people get sick around New Year and interfere with our best laid brewing plans…but such is life and I am always a doctor first.  Better late than never and I get to call today’s brew New Year’s Eve Jackass Bitters Brown Ale!

As I mentioned previously, maize has a higher gelatinization temperature than barley; so high, in fact, that the active enzymes for starch conversion are denatured.  This means that the usual temperature steps in mashing have to be altered so as to both keep the enzymes and gelatinize the maize starch.

The way to get around this then, is to start mashing in the usual way with the normal Beta-glucan and protein rests and then siphoning off the wort that is there, keep it somewhere safe and clean while more water is added to the grains.  The grains and water are then boiled for five or ten minutes, cooled to mashing temperatures and the liquid that was taken off is added back in (hopefully with all the enzymes still intact); the conversion then is finished in the normal way.

If you want the detailed recipe and procedure followed check it out here:  Bored-In-Belize:  Brewing New Year’s Eve Brown Maize Ale.

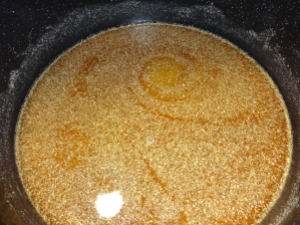
I’ve only included a few photos (look at the full recipe for more) since they really all look the same…a big pot with stuff in it…

Beta-Glucan Rest at 40C for 25 Minutes.

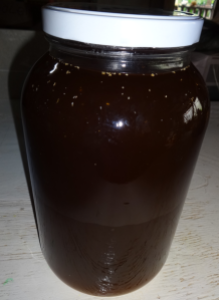
Here is the wort siphoned off into a gallon jar for safe keeping:

Jar of Siphonings Collected After Protein Rest.

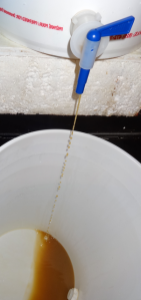
Here’s a photo of sparging all of the wort before the final boiling with Jackass Bitters.

Sparging the Wort.
Sparging the Wort.

The rest of the brewing process is straight forward and follows the usual steps.

There it is, the New Year’s Eve Brew is completed!

Christmas Pudding Soap.

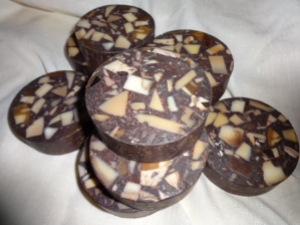
AvatarMunchkinHello Everyone!  Just something short and sweet for the holidays.  This is a picture of some Christmas Pudding soap which Gnome made over the holidays (when he wasn’t messing around with stingless bees).

Christmas Pudding  Soap.
Christmas Pudding Soap.

These are coconut oil soaps with added cacao.  Gnome likes to express his artistic side in his soaps. If only they were edible!

If you want to see more pictures of our Artisan Soaps, please take a look at the page link in the Products section.  Our Shop will be coming soon!!

Brewing Preparation Day.

Gnome.Pushing.Up.GlassesI would continue on the theme of brewing maize beer today:  As I mentioned before, home-brew shops, barley and hops are unavailable here so, I have had to go about things a bit differently.  One of my previous posts was about malting corn (maize); having done this and having kilned some of it into the maize equivalent of Chocolate, Crystal and Munich malt, I am ready to proceed to the next step…getting everything ready physically and psychologically (I have never done whole grain brewing using firstly, my own malted grains and secondly, those grains being maize and thirdly, replacing hops with a different bittering agent).

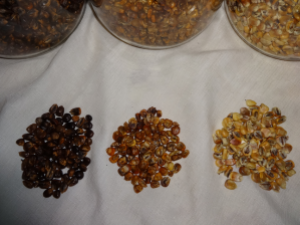
So here are my kilned malts, Chocolate, Crystal and Munich…

Chocolate, Crystal and Munich Maize Malt.

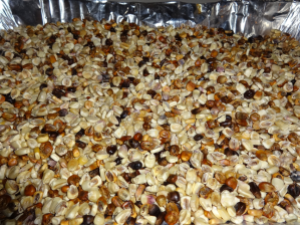
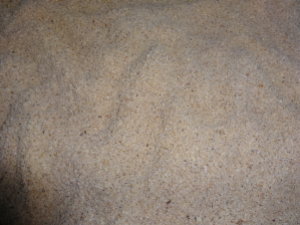
Maize has a higher gelatinization temperature compared to barley which means some playing around with temperature is going to be necessary in order to make the starch do what it is supposed to and at the same time not denature the necessary enzymes prematurely before conversion has taken place.  The other issue is that maize does not have a hull and I am going to use rice hulls from the rice mill during sparging.  Since I am doing this, I decided to grind the maize malt very finely…

Malts Before Grinding.
Malted Maize After Grinding.

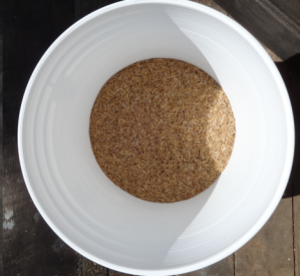
Doing this by hand took a ridiculously long time and that is why I have needed a whole day just for preparation!  The rice hulls also needed a lot of cleaning since “getting rice hulls from the rice mill” does not mean buying a packet from them, it means going out the back with a sack where the mountain waste pile is out in the open and finding the freshest hulls next to outlet.  It further means soaking them, bleaching them, drying them, sieving the sand, bugs and crap out of them…it took about two weeks of work…

Lautering Tun with Rice Hulls.

In terms of hops, I have decided to go with Jackass Bitters.  I was thinking of Serosi or Bitter Gourd but Jackass Bitters won out simply because to be able to say, “I made beer with Jackass Bitters!” sounds way cooler than “I made beer with Bitter Gourd,” I’m sure everybody would agree.  I decided to extract some Jackass Bitters into a tincture just to be able to standardize the bitterness; again, I’ve never done this before and I have to start somewhere in order to get some sort of reproducibility for future batches.

Ground Jackass Bitters.

Okay, all the ingredients have been prepared and everything is getting sanitized today, let’s see if tomorrow is a nice day for the actual brewing…

Catch you later!!

Christmas Fruit Leather Yule Log.

Munchkin.Eating.Bun

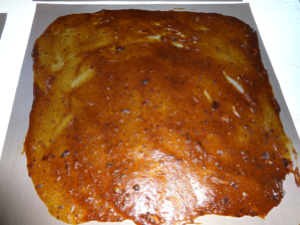
Here’s one for the Festive Season.  I have taken a Tropical Fruit called “Sour Peach” and made a Christmas Fruit Leather with raisins, cinnamon and cloves.  Here in Belize, the days are hot and dry so it is the perfect time for sun-drying food outside.

Christmas Fruit Leather.

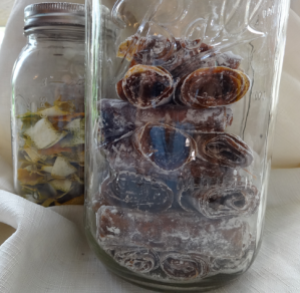
Sour Peach imparts a tanginess to the taste of the leather which gives a “sweet and sour” taste.  It takes about 2 to 3 days for it to completely dry.  After this, it is dusted with cornstarch, cut into lengths and then rolled into Yule Logs.

Fruit Leather Yule Logs.

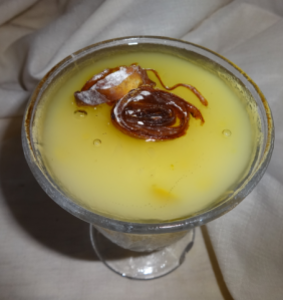
These Yule Logs are very versatile and make a great garnish for desserts and puddings.  The rolls can be sliced and used as a topping:

Fruit Leather Garnish.

They can also be served whole with turkey or ham as an interesting, tropical accompaniment to traditional Christmas fair.

Read my full recipe: Fruit Leather Yule Logs.


Curing Tobacco With Pressure (and a Little More on Bees)!

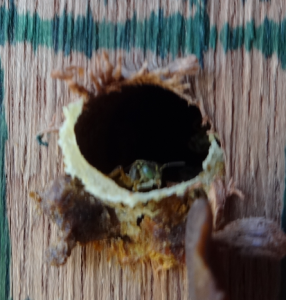
Gnome.Straight.SmileLet’s start with the bees since I’m really excited about them.  Looks like they have been busy little…well, bees…they’ve started building their entrance tube…

Bees Working on Their Entrance Tube.

Sorry about the pics, you can tell I really can’t take pictures to save my life!

Anyway, about tobacco.  Last I talked about it, I didn’t know whether it was going to dry properly but fortunately the weather has cooperated and I managed to get almost all of it in a condition to proceed with curing.

After it turns brown, I make a mixture of honey, water and my chocolate essential oil which is then put into a spray bottle and sprayed onto the dried leaves.  I had a photo of this but all you could see was my big hands…The sugar in the honey helps the leaves stay moist but allows them to dry without being brittle (in the finished product).

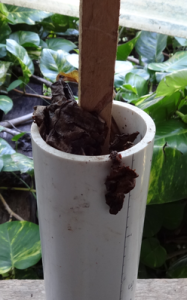
What I do next is stuff everything into a three inch PVC pipe fitted with wooden blocks and use a stick to stomp all the leaves in, like so…

Filling Up Tube With Tobacco Leaves.

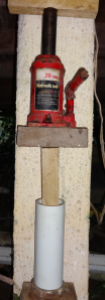
After all this has been done, I get my 20 ton jack, go under the house and do this…

Applying Pressure to the Tobacco Leaves.

Everyday, I increase the pressure until the leaves cannot be compressed anymore.  The leaves will continue to ferment and develop all of those wonderful aromas that nicotine addicts love, especially since extra chocolate oil was added.

And then…you keep this whole setup going for six months to a year before it is done…it turns out to be a very good way to stop smoking tobacco, afterall, surely you can’t still be physically addicted to nicotine after six months to a year!!

Cheers!


Black Pepper Galore!

Munchkin.Another.LookThis year, our black pepper plants started bearing well.  The last few years, we have just had a few minor fruits but not much to speak of.

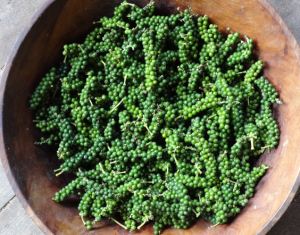
Harvested Green Peppercorn.

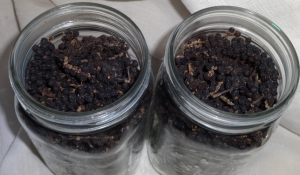
The picture above shows picked peppercorns from two plants only.  The green drupes started in September and I had actually been watching them all this time waiting for them to mature to red peppercorns.  At that stage, white pepper can be made through a process of retting and fermentation.  But, alas I have grown impatient and decided to have black peppercorns this year.  So, for the last few days, the pepper has been spread out to dry in the sun.  It took 3 days for the pepper to dry completely to its black state.  I managed to get two quart jars of dried black peppercorns…not bad from just two plants.

Dried Black Pepper in Jar.

Just out of interest, to keep the green colour of the pepper they have to go through a preservation process (using sulphur dioxide like in dried fruit) before drying.  Similarly, to get red peppercorns, preservation of colour with a chemical is used before drying.

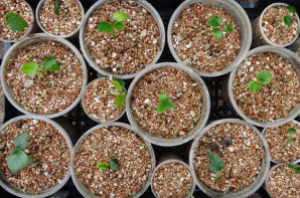
Our black pepper plants were grown from cuttings about 2 to 3 years ago. This perennial woody vine prefers shade and so we planted ours next to coconut trees so that the vine would grow up the trunks.  This was a great combination because the fallen coconut leaves produced humus and leaf litter which set up perfect growing conditions for the pepper. Piper nigrum are known to produce fruit for up to 7 years after the first flowering.  I found some pepper seedlings in the leaf litter and I have potted these so that we never have to buy black pepper again!

Black Pepper Seedlings.

Anyone for a Shoot of Tequila!

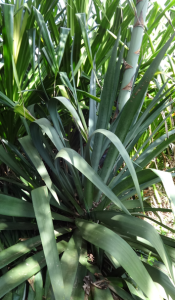
Munchkin.ShoutingOur Agave plant has shot up a massive flower stem which is 20 feet in height!  This is an extra-ordinary plant because it only flowers once at the end of its long life (10 to 30 years) and then the plant dies.

Flower Stem of Agave americana.

At this point, before the stem actually flowers, the stem can be cut to collect a sweet liquid known as “aguamiel” or “honey water”.  This liquid can be further fermented to produce a traditional Mexican drink called Pulque.

Agave americana, also called Century Plant.

Agave americana is one of the Agave plants used in the production of Tequila.  This involves extraction of the plant sugars by heating the heart of the plant in an oven.  Tequila is made by a distillation process there-after.

Anyone for Tequila or Pulque?!


Messing With The Bees!!

Gnome.OroToday I moved some bees into my new hives!

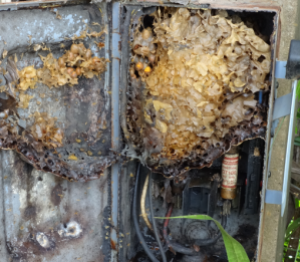
I had a colony of stingless bees living in my electricity breaker box; needless to say, not the best place for them…

Wild Bee Hive in Breaker Box.

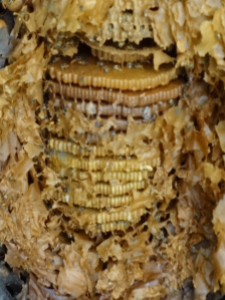
The first thing was to remove the wax surrounding the brood chamber…

Exposed.Brood.Comb
Brood Comb Exposed.

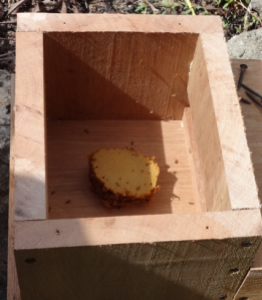
I then had to carefully pry all those combs out in out in one piece trying not to damage anything as much as possible.  I then carefully halved the comb (since I made two hives) and put them in their new brood chambers…

Half.Brood.Comb.in.Brood.Chamber
Half of the Brood Combs Gently Placed in Each Hive.

The covers were then all sealed up and the hives moved closer to the house for protection and observation.

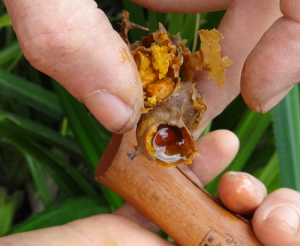
This was also the first time we tried stingless bee honey.  It was delicious; sweet but more watery than normal honey and with a truly intense floral aroma.  It was like drinking liquid flowers.  We also tried some of the pollen and the only word I can think of to describe it is amazing.

Unlike the bees we are familiar with, the honey and pollen is stored in pots…

Stingless Bee Honey and Pollen Pots.

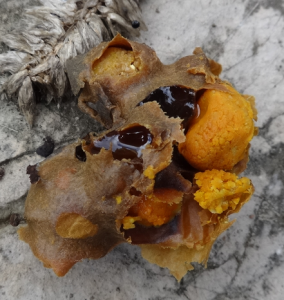
Here’s a closer look without my grimy paws in the way…

Honey and Pollen Pots.

I’ve spent the whole morning looking at my new friends and they are starting to zoom in and out of their new homes, making it nice and comfy for themselves.

I can’t wait to build more hives!!!

I hope you are having as wonderful a day as I am!!