Today was supposed to be a day of hard outside work, the coconuts still need more cleaning and weeding but…the plans of mice and men aften go astray…so the rain and cold weather decreed. The next best thing, I guess, is to bottle some of that New Year’s Eve Brown Ale I made.
It is a fair bit of work, to be honest, especially this first time that we had to wash, clean and sterilize the bottles we got from town. They were filled with old napkins, cigarette butts and I hate to think what else…
Here two cases have been cleaned, washed and filled with some sanitizing solution.
After a few hours, they have to drip dry before they can be used…
Drip drying the bottles.
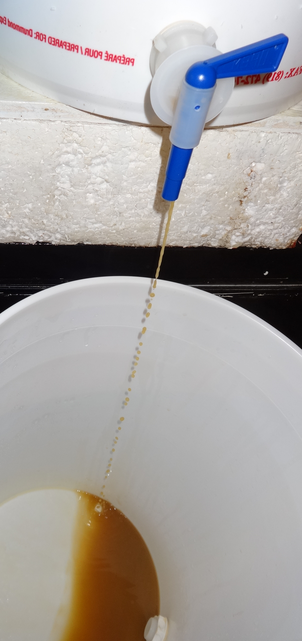
In the mean time, the maize beer needs to be siphoned into a bottling bin…
Maize beer and the bottling bin/bucket.
…and the priming sugar needs to be boiled…
Boiling the priming sugar.
It is only after all this is done that we can start filling the bottles and placing the caps on them.
The bottles are filled and the caps are resting on top of them.
Now we can finally use the capper to seal everything up. As a side note: A big thank you to Speedo for bequeathing his bottle capper to us…I would have hated to do this job by hand…
Capping away…almost done…
And here is the finished project!!
Yey, finished!
I’ll let you know what it tastes like in a few weeks…in the mean time…may all your beer be cold and bubbly!!
It is nice to have an alcoholic beverage at the end of the day to wind down after some hard work. After having lived here for so long and having tried all of the drinks available, I have had to go back to my student pass-time of brewing. In this climate, rum and spirits are generally too strong; the cheap spirits aren’t distilled well enough to enjoy; the expensive spirits that could be enjoyed burn a hole in our pockets; wine is also expensive and generally crap, no matter where it has come from (and has sat at customs in a container in 45C heat for weeks to months); and the beer is fine if you just like a light lager style. Unfortunately, this situation is unacceptable to a Gnome of my (lack) of sophistication and home brewing has become a necessity for a continued existence. Brewing is fun and, as the Italians would put it, the result doesn’t taste of copper.
I’ve already talked about malting corn and making gluten-free beer from it but this requires quite a bit of work to get happening: the sprouting, kilning, roasting, mashing…it all ends up taking something like six weeks to get accomplished. So, the next logical answer is mead. I’m not at the stage of producing my own honey but fortunately, rainforest honey is available here and turns out to be much easier to brew than beer.
Traditional mead ends up being quite strong, 12-14%, and I find that this level of alcohol only allows a small drink, any more and the price is a headache. So I have reduced the concentration of honey in my meads so that the final result is closer to a beer, say 4-5%. This allows one to drink a pint without getting drunk and also appreciate the flavour of something different.
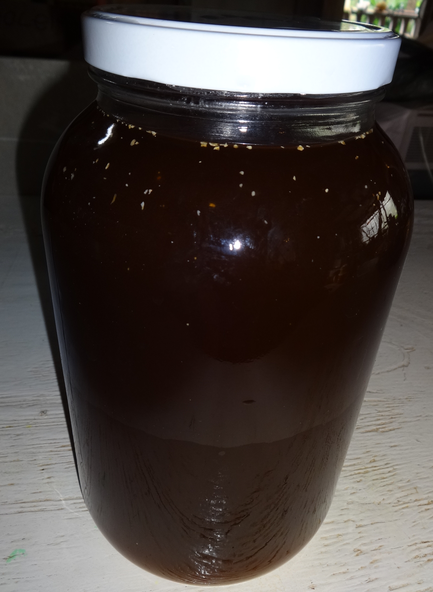
This is the honey that I use:
About Four Litres of Rainforest Honey.
You can see that it is a dark honey and if you could taste it, the strong almost musky flavour would be very evident.
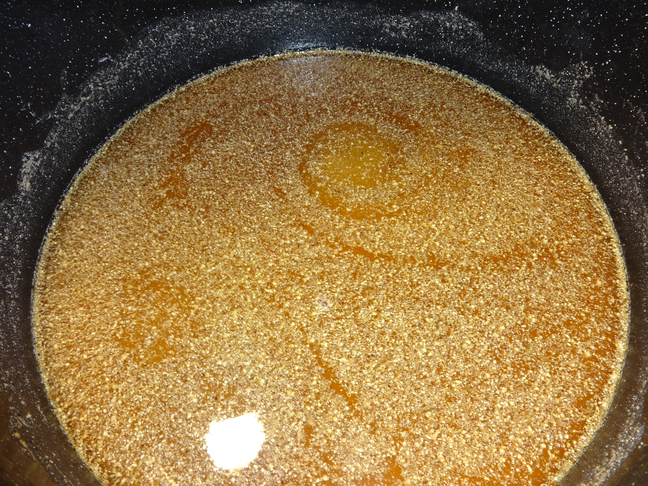
It all gets poured into a big pot with added water to make five gallons and boiled for five or ten minutes to sterilize it. Then the specific gravity is checked once cooled down…
Checking the Specific Gravity.
…to make sure that the concentration of sugar is right (to make a 5% strength mead). It is put in a brew bin and fermented with some lager yeast for a few months as mead generally takes longer to brew than normal beer.
I’ve been making “everyday” batches to drink early, like a Beaujolais nouveau (without being red, obviously), since Munchkin really likes mead for an evening drink and to cook with but I’ve also put some away to slowly clear and age. Eventually bottling it so that it can have a nice fizz.
I’ll let you know in a few months how the “special brew” turns out!
I’ve had to postpone brewing until today…it is amazing and unfortunate that people get sick around New Year and interfere with our best laid brewing plans…but such is life and I am always a doctor first. Better late than never and I get to call today’s brew New Year’s Eve Jackass Bitters Brown Ale!
As I mentioned previously, maize has a higher gelatinization temperature than barley; so high, in fact, that the active enzymes for starch conversion are denatured. This means that the usual temperature steps in mashing have to be altered so as to both keep the enzymes and gelatinize the maize starch.
The way to get around this then, is to start mashing in the usual way with the normal Beta-glucan and protein rests and then siphoning off the wort that is there, keep it somewhere safe and clean while more water is added to the grains. The grains and water are then boiled for five or ten minutes, cooled to mashing temperatures and the liquid that was taken off is added back in (hopefully with all the enzymes still intact); the conversion then is finished in the normal way.
I would continue on the theme of brewing maize beer today: As I mentioned before, home-brew shops, barley and hops are unavailable here so, I have had to go about things a bit differently. One of my previous posts was about malting corn (maize); having done this and having kilned some of it into the maize equivalent of Chocolate, Crystal and Munich malt, I am ready to proceed to the next step…getting everything ready physically and psychologically (I have never done whole grain brewing using firstly, my own malted grains and secondly, those grains being maize and thirdly, replacing hops with a different bittering agent).
So here are my kilned malts, Chocolate, Crystal and Munich…
Chocolate, Crystal and Munich Maize Malt.
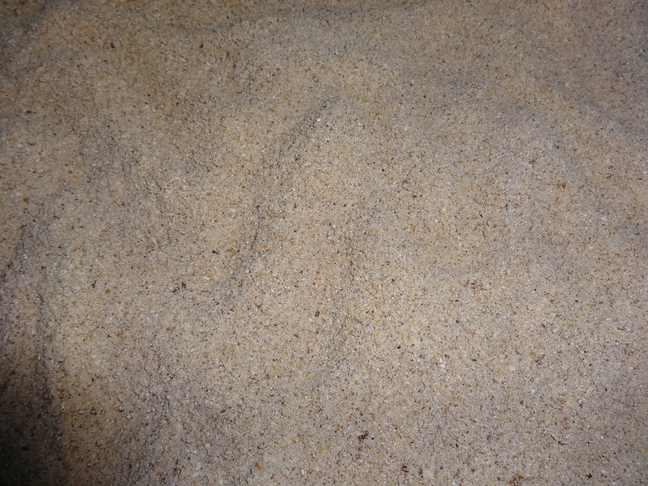
Maize has a higher gelatinization temperature compared to barley which means some playing around with temperature is going to be necessary in order to make the starch do what it is supposed to and at the same time not denature the necessary enzymes prematurely before conversion has taken place. The other issue is that maize does not have a hull and I am going to use rice hulls from the rice mill during sparging. Since I am doing this, I decided to grind the maize malt very finely…
Malts Before Grinding.Malted Maize After Grinding.
Doing this by hand took a ridiculously long time and that is why I have needed a whole day just for preparation! The rice hulls also needed a lot of cleaning since “getting rice hulls from the rice mill” does not mean buying a packet from them, it means going out the back with a sack where the mountain waste pile is out in the open and finding the freshest hulls next to outlet. It further means soaking them, bleaching them, drying them, sieving the sand, bugs and crap out of them…it took about two weeks of work…
Lautering Tun with Rice Hulls.
In terms of hops, I have decided to go with Jackass Bitters. I was thinking of Serosi or Bitter Gourd but Jackass Bitters won out simply because to be able to say, “I made beer with Jackass Bitters!” sounds way cooler than “I made beer with Bitter Gourd,” I’m sure everybody would agree. I decided to extract some Jackass Bitters into a tincture just to be able to standardize the bitterness; again, I’ve never done this before and I have to start somewhere in order to get some sort of reproducibility for future batches.
Ground Jackass Bitters.
Okay, all the ingredients have been prepared and everything is getting sanitized today, let’s see if tomorrow is a nice day for the actual brewing…
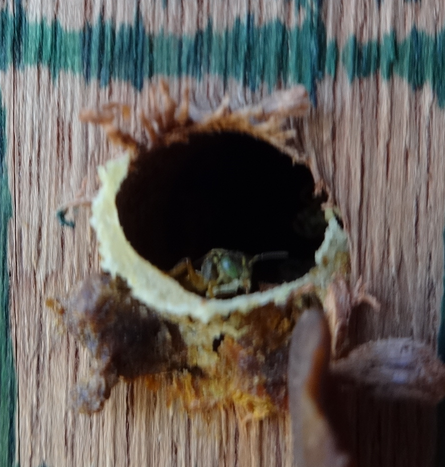
Let’s start with the bees since I’m really excited about them. Looks like they have been busy little…well, bees…they’ve started building their entrance tube…
Bees Working on Their Entrance Tube.
Sorry about the pics, you can tell I really can’t take pictures to save my life!
Anyway, about tobacco. Last I talked about it, I didn’t know whether it was going to dry properly but fortunately the weather has cooperated and I managed to get almost all of it in a condition to proceed with curing.
After it turns brown, I make a mixture of honey, water and my chocolate essential oil which is then put into a spray bottle and sprayed onto the dried leaves. I had a photo of this but all you could see was my big hands…The sugar in the honey helps the leaves stay moist but allows them to dry without being brittle (in the finished product).
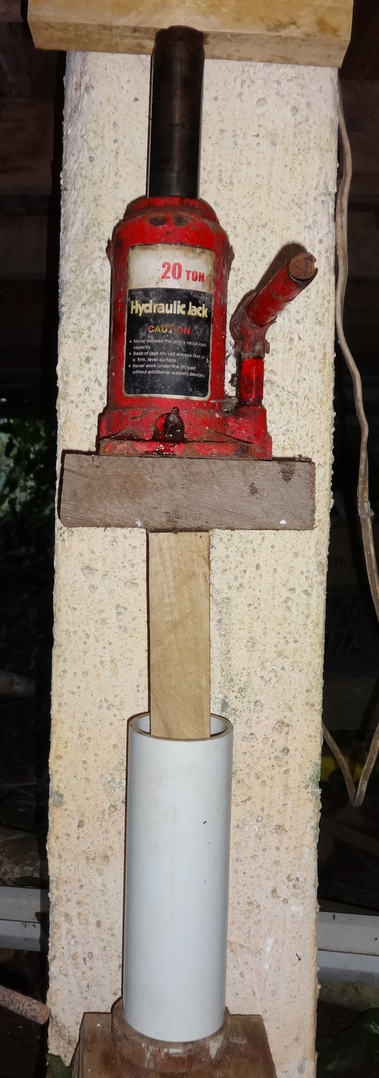
What I do next is stuff everything into a three inch PVC pipe fitted with wooden blocks and use a stick to stomp all the leaves in, like so…
Filling Up Tube With Tobacco Leaves.
After all this has been done, I get my 20 ton jack, go under the house and do this…
Applying Pressure to the Tobacco Leaves.
Everyday, I increase the pressure until the leaves cannot be compressed anymore. The leaves will continue to ferment and develop all of those wonderful aromas that nicotine addicts love, especially since extra chocolate oil was added.
And then…you keep this whole setup going for six months to a year before it is done…it turns out to be a very good way to stop smoking tobacco, afterall, surely you can’t still be physically addicted to nicotine after six months to a year!!
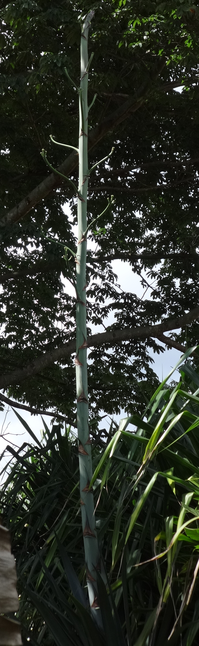
Our Agave plant has shot up a massive flower stem which is 20 feet in height! This is an extra-ordinary plant because it only flowers once at the end of its long life (10 to 30 years) and then the plant dies.
Flower Stem of Agave americana.
At this point, before the stem actually flowers, the stem can be cut to collect a sweet liquid known as “aguamiel” or “honey water”. This liquid can be further fermented to produce a traditional Mexican drink called Pulque.
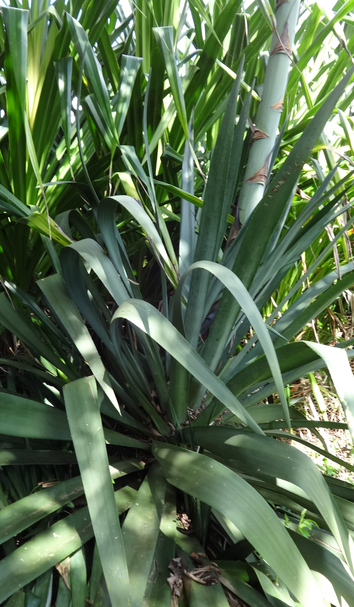
Agave americana, also called Century Plant.
Agave americana is one of the Agave plants used in the production of Tequila. This involves extraction of the plant sugars by heating the heart of the plant in an oven. Tequila is made by a distillation process there-after.
Like most foreigners that have come to Belize, we wasted a lot of money buying (really crappy, cheap, screw-top wine priced like fine, premium) wine in an attempt to have a taste of home and feel sophisticated. In addition to the price, the heat and humidity, the higher alcohol content of wine was sure to make us uncomfortable for the whole night, the fuzziness continuing to the next day and making work difficult. Now, after having lived here a while and given up all pretense at being sophisticated, we just want some good, honest-to-God, alcohol that doesn’t burn a hole in our pocket or our stomachs.
Having had some experience while at University with brewing, the obvious answer is to brew some beer. How to do this, though? There is no friendly brew-shop down the road to get all the essential ingredients…no barley, no hops, no nothing!
Well, we do have plenty of maize, grown by the bushel by our friendly Mayan neighbours (I’ve tried growing corn and I just haven’t managed yet…go figure!), GMO free and cheap. What do you do with it, though?
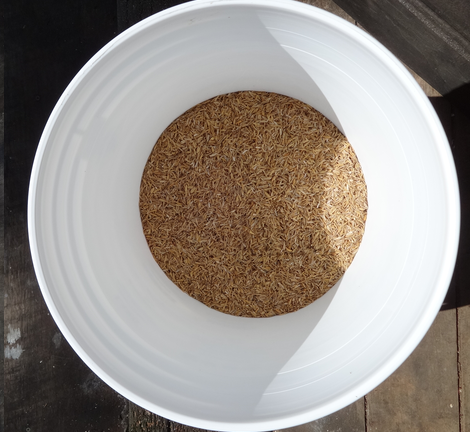
The first step is this…
Sprouting Maize for Malting.
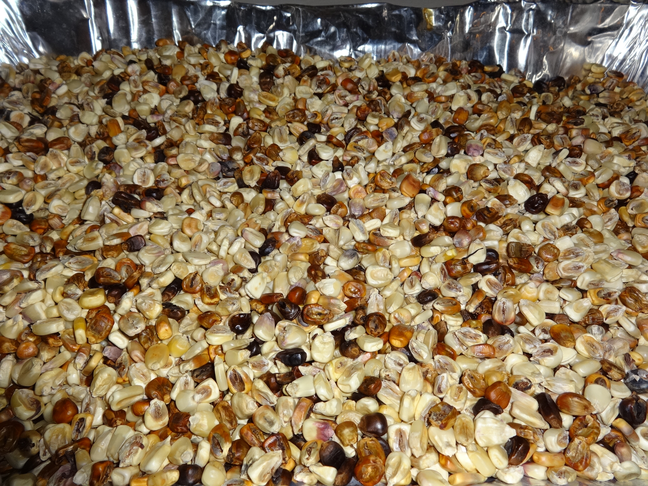
After the maize has sprouted it needs to be dried before it can be turned into the different types of malt we are all familiar with…like, pale malt, chocolate malt, Munich malt, crystal malt, etc. Here it is dried…
Dried Malted Maize.
And this is the basis for my maize, gluten-free beer.
For a more detailed discussion on the malting process have a look in our Bored-in-Belize section for Malting Maize.
Tune in next time for Part II, Brewing with Maize.
It is always interesting when you talk about tobacco. Our present society frowns quite heavily upon this poor plant. It is even worse when you are a doctor…I think you are supposed to be very strongly opposed to anything to do with it, unless you happen to be using it to spray on your plants (which we also do). Unfortunately, I seem to have missed this collective meeting of humanity and continue to forge a relationship with this beautiful plant even though everybody seems to disapprove.
Tobacco Harvest.
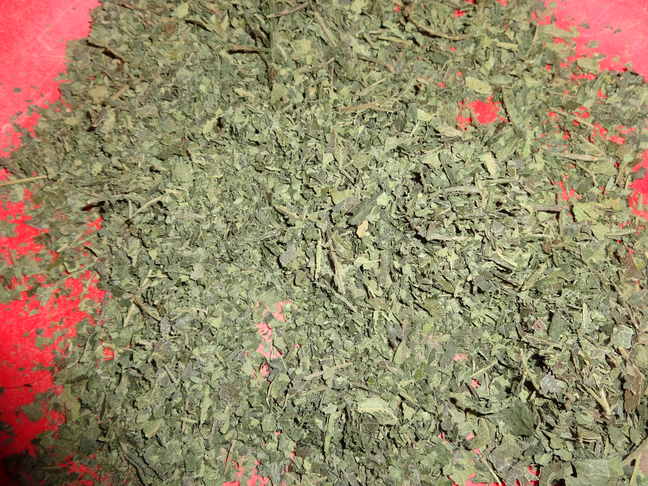
Munchkin was kind enough to collect the harvest for me on a previous post and started the initial browning of it. Our particular style of browning involves sticking all the leaves in a cardboard box and letting everything ferment (ie. start to rot) and turn from green to yellow to brown. Everyday the leaves have to be turned and aerated so they don’t frankly rot. As the leaves yellow and brown, they are removed from the rest and laid out to dry, like so…
Tobacco leaves that have lost enough green to be air-dried.
The weather has been quite cold and damp and the drying probably isn’t going to go that well (which means that we might be using it as plant spray) but I’m going to give it a go anyway and see what happens. If I get lucky and it works out I’ll tell you what happens next…
 Today was supposed to be a day of hard outside work, the coconuts still need more cleaning and weeding but…the plans of mice and men aften go astray…so the rain and cold weather decreed. The next best thing, I guess, is to bottle some of that New Year’s Eve Brown Ale I made.